Showing posts with label Lady Grey. Show all posts

Friday, March 25, 2011

Friday Mash-Up: Lady Grey Blues, Sharp Scissors and a Revelation

I posted my final thoughts on my Lady Grey adventure on Pattern Review the other day: click here for review

And now that I'm finally done, I've definitely been suffering from a case of the blahs. Somehow, getting back to work on my pants with welt pockets just doesn't seem terribly exciting. I just don't know what to do next. Honestly, between Monday and Wednesday, I seemed unable to focus on any hobbies. Runs were planned and then canceled, cookbooks were flipped through and cast aside, Burda arrived and was ignored. But then, there was a very little ray of light: before I went to London I had mailed my shears, which had been very very dull, back to Gingher for resharpening. They arrived back yesterday, all sharp and pretty.


So, now I am eager to cut into some fabric. But what?  Then I saw that Faye has announced an "Over the Top Challenge" - sewing tops for the first 15 days of April as a blitz sew along. And Karin of Making the Seam just sewed up Burda 2/2011 102B, which I had also noticed when that terrific issue had arrived. So this is definitely a possibility.

Still a bit undecided on what next, last night I decided to flip through my patterns and get some inspiration and ideas. That is when I had a somewhat shocking revelation: I am a closet pattern hoarder. I never quite realized this because my fabric stash is so modest and judicious. And unlike my fabric, which is neat and organized, if you count 2 years of Burda magazines, I've got patterns stashed in four different places! Five if you count the stack of newest patterns that are on the nightstand as reading material! And I've got even more patterns in my shopping cart at several on-line pattern stores, just waiting for a sale.

So, project number one this weekend will be to de-clutter and organize what I already have before ordering a single other pattern. THEN I will hopefully have a plan for what to sew next.

Have a great weekend everyone!


Monday, March 21, 2011

Le Grande Orange: Montreal, Lady Grey and Camera Troubles

Well, I know I've been promising Lady Grey pictures for more than a week now. So, you would think that my trip to Montreal (3 days work, 2 days play) would be an ideal time to get Phineas to snap a few, since I wore my coat the whole time. And you'd be right. Except for the fact that my camera has decided to stage a strike; it is periodically refusing to open it's lens (the cover is refusing to retract) when I turn it on. So, in addition to the fact that Phineas hates taking pictures and I am a reluctant model, we now have temperamental equipment.

Le Grande Orange
However, all was not lost and we did get at least a few pictures in the old section of Montreal - Vieux Montreal - with me wearing Lady Grey, which Phin has now nicknamed "Le Grande Orange". (Sigh. Men and their baseball references.)

This was a cute little cafe where we had brunch on Saturday.


Montreal is a really fun town. It really does feel a bit more like Europe than North America, and that isn't just because of all the French speakers and French food, although sitting in a cafe sipping a cafe au lait and eating a croissant does help.  I think the best American comparison is that Montreal is a bit like Boston. The plateau section has a similar feel to Newbury Street and the old part of town looks and feels like the old sections of Boston. It is a great city for walking when the weather cooperates.


Walking down the street of Vieux Montreal, the old part of town

And from the back...

Sitting on Place Jacques Cartier
I am deliberately leaving out the photo that Phin took of me with traffic cones to show how similar the color is. Ha ha ha. But truly, I have no fear of being hit by a car while wearing this coat. The color is intensely eye-popping. And here is my very vain confession: I received many compliments while wearing this coat from random strangers (at the airport, in the hotel lobby...) and from business associates, too. And it felt wonderful - like all that work has really paid off. With all the black and gray and dark colored coats one sees, this one really stands out in a crowd.

Now that I've been wearing it non-stop for a week, I do have some thoughts on the fit and the pattern, etc. Full practical review to follow.

Monday, March 7, 2011

Heading to the airport...

Here is an action shot of me wearing Lady Grey on the way to the airport...


One confession: it still doesn't have snaps/buttons. But they are in my suitcase and will be sewn on while I'm in London. Full review to follow, once I am back home.


Friday, March 4, 2011

Rounding third...


Very Quick Update: Tomorrow evening I leave for a business trip to London, and I am determined to wear Lady Grey to the airport. Right now, all that is left to do is final topstitching (the lining is in!!!), sewing the sleeve lining to the sleeve hem, and sewing on the belt loops and snaps (I decided on large snaps rather than buttons).

There are some optional finishing steps that I'll do if I get the time, like invisibly stitching the lining to the coat shell along the princess seams and sewing the lining hem to the coat hem. 

Thank you to everyone who has been cheering me on with this project - your comments have really kept me going. I can't wait to show you the final pictures!

Monday, February 28, 2011

The Home Stretch!

So, over the weekend I toiled away at my Lady Grey...


I finished the collar and set in and hemmed the sleeves. I also hemmed the coat shell and finished the lining's sleeves with black lace. By Sunday afternoon, I had decided to work late into the night, if necessary, to finish the coat by morning.

Naturally, that was when this happened:


I ran out of topstitching thread with one seam left to be stitched. Moments later, I also ran out of the silk thread that I have been using for pad stitching and hand sewing. In other words, I reached an impasse. C'est la vie.

Since I can't attach shell to lining until the shell is fully topstitched, I did the only sane thing I could do. I turned on the Oscars Red Carpet. But today, I braved the rain to go get more thread and now I am ready to push through and finish this coat!

Friday, February 25, 2011

Mini Project 2: Running My A$$ Off. Literally

 
I know I haven't mentioned running since I posted about my 2011 goals back in January.  But in this case, no news is good news.  I've been quietly going about my training, on the road to the Superhero Relay. I'm sure it's having an impact on my sewing. First, there are the longer workouts, which means less time at home. Then, when I do get home after a weeknight run, all I want to do is sit on the sofa and eat peanut butter out of the jar. Or Nutella. Mmmmm, Nutella... So, there is less weeknight sewing happening.

An additional side effect of all this running is that my body has changed a bit. All my pants and skirts are a bit too big. Apparently, I am running my a$$ off, quite literally. So, my other mini project over the weekend, after a particularly unsuccessful shopping trip, was to begin altering some pants and a skirt. Currently they are all pinned and waiting to be sewn.

Those of you who sew, do you also alter RTW clothing - either when you buy them or if your body changes?  Do you go back and alter garments that you made for yourself? Tasks like taking in a waist or re-hemming can be tedious (booooring!). I'm wondering if this is the kind of chore I should just pay the local seamstress to do.


Alterations and running aside, last night I did motivate myself to finish pad stitching the collar of my Lady Grey. I steamed it before bed and left it to dry around my tailor's ham to help shape it. So, I am looking forward to a productive weekend of sewing. I hope you are too!


Tuesday, February 22, 2011

Do you ever feel like a broken record?

I do. And right now the tune I'm stuck on is Lady Gray... I hope you are not finding my progress reports too tedious. I did quite a lot this weekend, despite getting a little side-tracked with two mini-projects (more on that this week). Here's what I accomplished:

I steamed the lapels and let them dry overnight. This whole pad-stitching and then steaming technique really is magic. The lapels now hold their shape - flopping back into a nice roll without being creased.

Lapel - shaped around a damp towel.

I cut the back stay out of hair canvas and basted it to the back/shoulder of the shell. And once the lapels had dried I sewed the front and back together, including the pockets.


Starting to look like a coat.

I also worked on the lining - now with sleeves and lace trim at the hem. Hmmm, I have a bit of lace left over. Perhaps I will add it to the sleeve hems on the lining. I think that might be a nice touch.

Lining - with sleeves and ready to go!


Lace trim on my lining hem.

I am still stitching away at the undercollar, but I hope to finish that up tonight. It will then get a good steaming so it holds its shape too. Oh, and there is the belt, which just needs to be top stitched.

Under collar and belt.


Next up with Lady Grey: setting in the sleeves and hemming the shell. I think I am just going to have to power through this week, doing a little something every night. Although it is too cold today, I am ready to wear this coat! 

Tuesday, February 8, 2011

Stitch, stitch, stitch, sneeze. Repeat...


I've had a cold for the last few days. The only things I've really been up to are napping, sipping tea and pad stitching. So, at least there is progress.


One lapel is completely done and the other is underway.  When both are done, they will get a good steaming and it will be on to pad stitching the collar. 

Monday, January 24, 2011

Lining for a Lady: Ahhhh silk...

I've been talking about (and buying pieces of ) silk for a while now. I just love silk. I love how it feels, how it looks... how it feels. It's really rather odd that the Lady Grey coat lining is the first time that I actually (I think) have sewn on silk. Admittedly, I was a bit intimidated at first. Silk can be slithery.


Lining with collar facing

Lucky for me, I had a game plan. I recently bought More Fabric Savvy by Sandra Betzina. What a great book - why did I wait so long to buy it?!?! I think one of the big challenges when you begin to sew is not just picking appropriate fabrics for a project, but understanding how to sew on different fabrics - what needle, thread and stitch to use, what kinds of interfacing or underling would work well, what setting to use on your iron, and so forth. Both my fabrics for this project - wool boucles and silk charmeuse - are new-to-me fabrics as far as sewing goes. So, having a handy reference to point me in the right direction is a huge asset.

Anyway, my lining is coming together nicely. (Lots more princess seams.) I had been worried about the seams puckering or the fabric being pulled into the throat plate and getting chewed up. I think I held my breath when I started sewing on it. But so far no problems. I am using a fine needle and small stitch length, as recommended, and my seams look good. There's a lot of raveling going on, so I will definitely not be leaving the seam allowances unfinished. But the lining should be ready to go when I need it... if I ever finish all the hand stitching. Ha ha ha.

Speaking of hand sewing, given how many seams there were to catchstitch down and how very slow I am at it, I finally caved in and decided to try topstitching the seams of the shell on my sewing machine instead. And, wouldn't you know it: I love the results! The topstitching thread doesn't really stand out from the boucles all that much, but the overall effect is that the seams look very finished and professional. So, for this time, at least, the easy solution is also the better one! 

Can you see the topstitching? Kinda hard.
So, tonight it is on to part 3 of hand stitching... taping the roll line of the lapels.

Tuesday, January 18, 2011

Princess Grey

I'm thinking of renaming the Lady Grey coat "Princess Grey" on account of the vast number of princess seams that I sewed on Saturday. Honestly, it was very satisfying work. Taking the time to do things carefully is rewarding in its own way - seeing each clipped and notched seam go together so nicely and press up without any puckers or pulls.


So pleased with these princess seams.

I made great progress on the coat, but unfortunately for you, it's at the point in the process where it just looks like a jumble of parts. I don't really have an exciting "reveal" photo since there isn't anything completely done.

Some parts l. to r.: Sleeves and belt (both inside-out), back piece and front/lapels.

In addition to sewing all the shell pieces that I could, I also started to sew up the lining (more on this tomorrow or Thursday). And I made slooooowww progress on the hand stiching. By now, I thought I would be doing all the pad stitches on the lapels. But I'm still catch stitching all the seam allowances down.

 
Can you even see my carefully sewn catch stitching on the right seam allowance? No. Oh well
One thing I will say is this: my hand sewing may not be getting any faster, but my stitches are definitely getting much more consistent and pretty!

I'm really enjoying working on this project slowly and surely. Somehow, it's very satisfying not to rush and to just enjoy the process.

Monday, January 10, 2011

Hand Tailoring: An Ode to the Tetanus Shot!

At long last I am actually sewing my Lady Grey Coat... very slowly, by hand and sticking myself repeatedly with a needle.


Neat little rows of hand basting.

Although it is not specified in the pattern instructions, I decided to do all of the hand tailoring recommended by Gertie. Aside from a better end result, my ulterior motive is to become better at hand sewing. Lucky for me, my tetanus shot is up to date for this endeavor. And, I can pretty much do the hand sewing while sitting in front of the tv* (perhaps this is the cause of all the sticking?)

I'm nearly done with Part 1 - basting the hair canvas to the front side shell pieces. It looks so neat, doesn't it? I feel all sew-y and impressed with myself at the moment. Anyway, I also cut all the lining pieces out of my beautiful silk charmeuse over the weekend. I just love this fun black/white/turquoise zebra print. Plus, I definitely I have enough left over to make myself a cami or some other little dainty thing.

Silk Charmeuse on the right.

Tonight I plan to finish basting the side pieces and then I will move on to Part 2 of tailoring the coat front, which is where things get a bit more complicated. Moving forward, I will probably intersperse the hand sewing with fits of machine sewing the other pieces of the coat. That way, when I am done with the hand sewing, I will be basically ready for assembly. More during the week...

* BTW - if you are not watching Downton Abbey on PBS, you need to get on board with it. It has intrigue, charm and great costumes! Even Phineas (who notoriously hates period dramas) was sucked in last night. With scheming servants, an inheritance crisis among the fading aristocracy, gender politics in pre-WWI Britain, and Maggie Smith, well, what more do you need??

Monday, December 27, 2010

Cut and Fuse

There is still no sign of my missing hair canvas. (Big sigh.) It would have been perfect to stay holed up in my nice warm Craft Lounge stitching away at my Lady Grey while the NY area dug itself out from the blizzard.

Oh well. But I did make some progress on the project! I was getting very nervous that my boucles fabric would ravel badly, especially once I snipped into it at the princess seams. It is a somewhat loose weave. So, I decided that a light interfacing that would not add bulk or affect the drape of the cloth (the hair canvas will do that), but would add some stability and keep the ends from raveling would help the situation. So, after testing all the interfacing in my stash, I settled on Pro-Sheer Elegance from Fashion Sewing Supply. It is the best.


Fused

So, I spent the majority of this afternoon cutting and fusing interfacing. I had to pause for about 2 hours when we lost power, but other than that, it all went smoothly. I admit that it would have been much easier to just block fuse the interfacing to the boucles before I cut it. But oh well. At least it is done. Now, back to searching for my hair canvas!

I hope you found a fun and productive way to ride out the storm if you are in the blizzard zone!

Tuesday, December 21, 2010

Snip Snip Snip

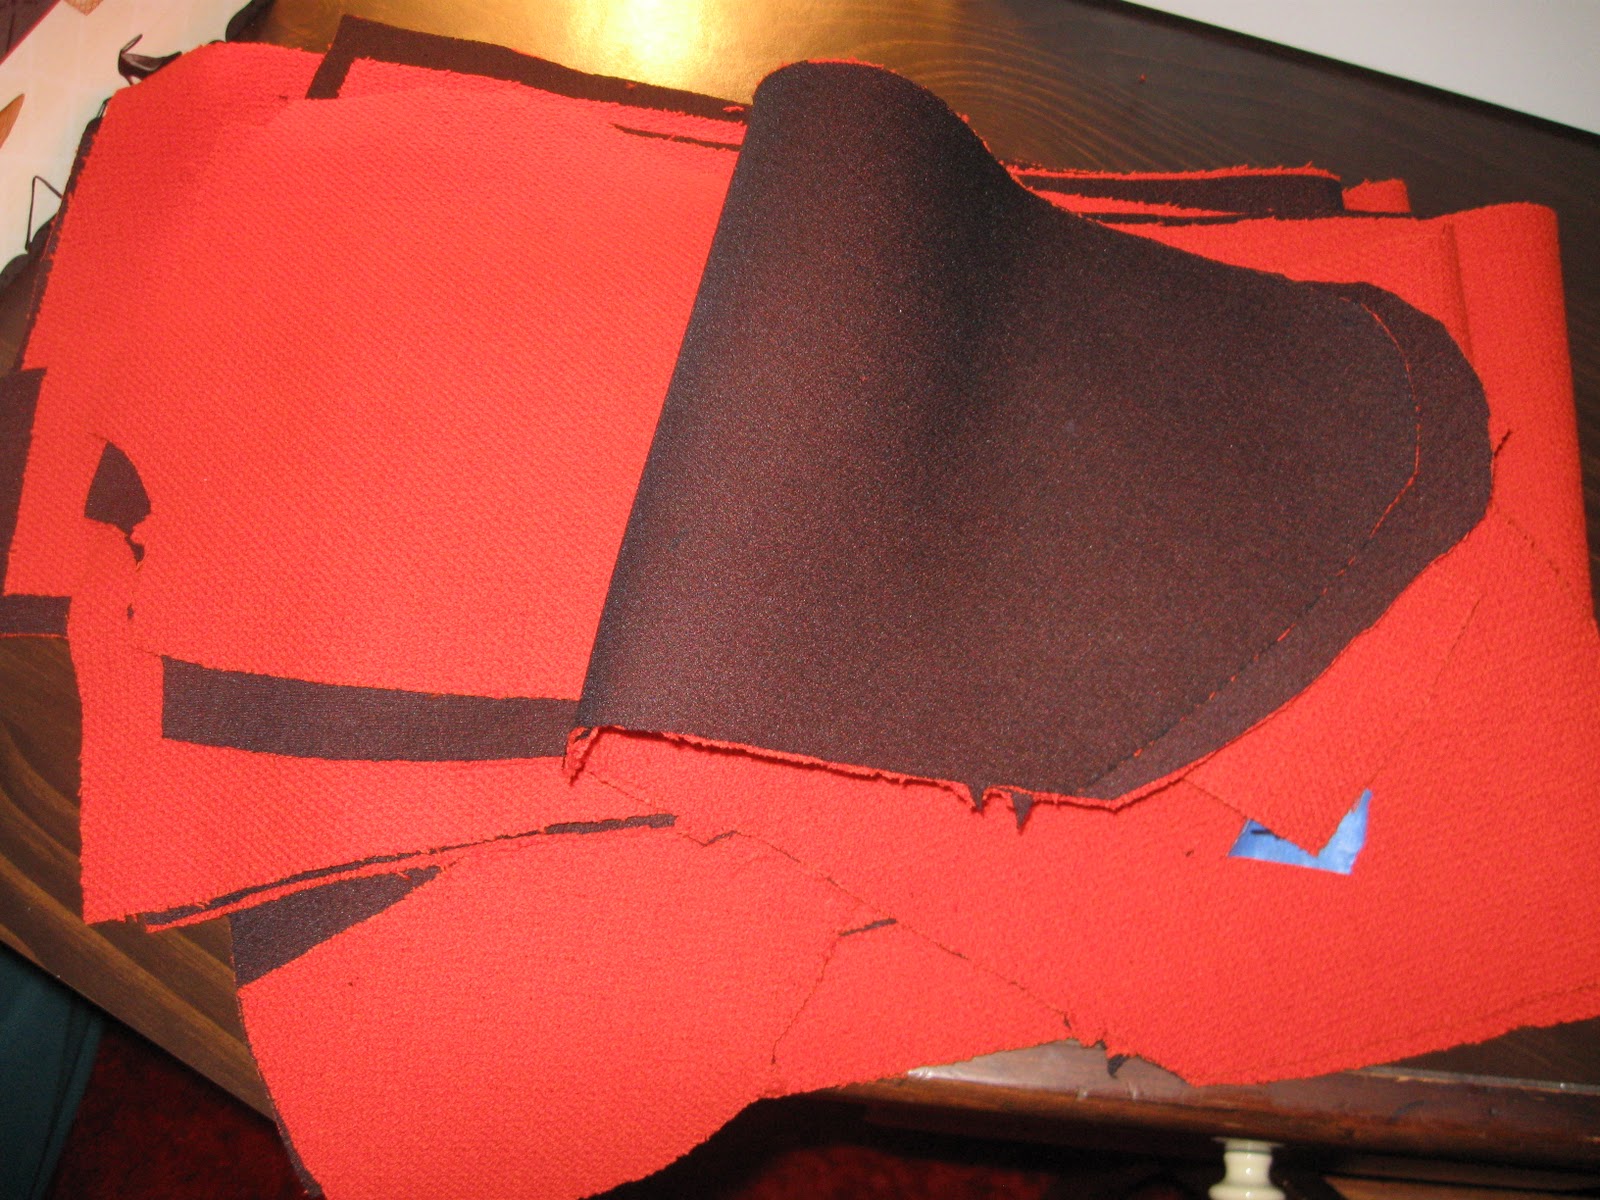
I am knee deep in a bunch of Christmas cooking projects (more on this during the week), but today, I made time to cut my Lady Grey Coat shell fabric - finally! While cutting, I had a revelation: my dress shears are dull. Seriously dull. Cutting through two layers of wool boucles was much more difficult than I expected and one of my fingers even has a mark where it was repeatedly rubbed by the shears. So, I think it is time for new shears. 

Lady Grey pieces

I am totally fatigued from the afternoon cut-a-thon. Honestly, I think cutting is my least favorite part of sewing. It seems to take me forever. Maybe that is because I don't have a dedicated area for cutting. I have to clear off the dining room table and carry every thing downstairs each time I want to cut something and then clean up when I am done. So, I tend to cut in long sessions rather than short bursts. Then again, maybe I am just slow at it. Who knows?  But, the coat shell is cut, and tomorrow it is on to cutting the lining and the hair canvas interfacing pieces.

I have to laugh at myself about this project. It's the first day of winter and defintitely too cold in NY for this coat now. But, with any luck, I will finish it by the time the weather starts to thaw and it is the right temperature for this coat. So, perhaps my slow sewing will be right on time.

Thursday, December 16, 2010

Lining a Coat: A Sewing Question For You

Well, I am home from my R&R break in Las Vegas. It was just what the doctor ordered. And now I am back into the holiday swing of things and in the Craft Lounge with my Lady Grey coat.

Help! I am stuck with my lining!
When I originally cut out the pattern pieces for the coat, I only cut the ones that I needed to use for the muslin. I didn't cut the pattern pieces for the pockets, belt, or lining. So, last night I finished cutting them.

When I got to the lining pieces, I ran into a question that I didn't know the answer to: given that I made changes to my muslin and ultimately to the pattern pieces for the shell of the coat, should I be making corresponding changes to the lining? 

For the pieces that are the same for both coat and lining (like the sleeve), I assume the answer is yes - same changes to both. But for the ones that are different - for example the back of the coat shell is 4 pieces with princess seams, but the back lining is in one piece - should I take the lining in by a similar amount to the shell of the coat so that it isn't too big - bigger than the shell??

Fellow fabulous sewistas, please chime in if you have any kind of experience or suggestions! Many thanks for your wisdom.

Monday, December 6, 2010

Lady Grey: The Definitive Muslin?

Over the weekend, I knuckled down and tackled my Lady Grey muslin.  Hooray. I am now ready to take scissor to fabric! There is enough ease in the muslin that once I cut the fabric and add interfacing and lining, I think it will fit well.

Front: lapels laying flat.
Side: Lapels not gaping
Back: Just right, I think.

The only change I made after taking these photos is that I narrowed the upper sleeve. I wear short sleeves or fitted knit tops in all but the coldest winter, when I would not be wearing this coat anyway. So, I don't really need extra room in the arm to fit a bulky sweater. I took an inch out of the sleeve being careful to make sure it did not cause any pulling or make the sleeve too tight. It's now hanging pretty straight (woo hoo!)

On Saturday night, I used the wet-towel method of shrinking my wool - ie: I put the fabric in the drier with a wet towel to create steam and shrink the wool. But I only used one hand towel and I'm a bit nervous that I didn't get enough steam to really do the job. So, I think I may try again tonight, just to be safe. I'm also going to try the muslin on one more time, just to make sure everything is exactly how I want it. Then, I will cut!

Monday, October 18, 2010

Lady Grey Muslin 2.1

A business trip at the end of the week and into the weekend kept me from posting about changes to my Lady Grey muslin. It also kept me out of the Craft Lounge.  So, here is an update on how things were going as of last week.

Things are starting to come along. I did some strategic pinning, taking in all the seams by about 1/4 inch from shoulder to a little above the waist.


From the front with a bit of the collar pinned out to prevent gaping.

From the back - definitely an improvement from this.


From the side - less gaping.
 
Here is another view of the back.
I may need to do a little more pinning across the back. Plus I need to finalize how much to pin out of the lapel so there isn't gaping in the front and work on the sleeves. However, I think that once I have sewn this up in my wool boucles, sewn in the stabilizers and added a lining, this will fit pretty well with the right amount of ease. I think that some of the little distortions are caused by the pins, and by the extra ease. It is just so difficult to judge the back! I don't want to make the muslin too fitted and then have my jacket be snug.  

Anyway, that is where I am with this project - let me know your thoughts!

Wednesday, October 6, 2010

Lady Grey Muslin 2.0

Over the weekend, I stitched up my second muslin for the Lady Grey Coat, this time in a size 8, with just 1 inch of extra length between the bust and waist. It definietly needs some fitting work. Obviously I want it to still have a good amount of ease so that it still fits once it is interfaced and lined, and I am wearing a sweater under it. But here is my initial assessment.


Front: There is too much room in the lapels and through the bust. The lapels gape forward away from my body, or they collapse to the side. So, I need to do the same alteration that sew-along leader, Gertie, did. (It's great that I have the same fitting issues as her, so that she can post the solutions for me, don't you think?)


Back: Funky things are happening across the back. There is still extra room between the shoulders. This photo is with a little bit pinned out from the center seam, but not enough. Although, now that I am looking at this photo, I am wondering if I need to let it out a bit at the waist. That might allow it to drape better across the waist and hip, taking care of those wrinkles across the princess seams. It is so difficult to fit the back of a garment on yourself.  Diagnosing fitting problems from a photo is not all that straightforward.  


Side: Actually, you can see the problems best in the side photo. See the gaping front and back? Yeah.  Also, I'm not sure what is happening with that crease along the sleeve from the shoulder to elbow. I have to investigate further. Looking at this, I am wondering if I actually needed the extra length that I added. I normally do need it, but perhaps that is what is causing some of the problems. Hmmm. That would be a ridiculously easy solution. Hmmm.

Anyway, I think this is much better than the original size 10 muslin, but it still needs work. I am going to play with it a bit and see how it goes and will get back to you, hopefully soon, with a finished muslin, or at least a new and improved version. 

Wednesday, September 29, 2010

Lady Grey Fabric!

Hooray!


What you are looking at is a red-orange boucles for the outer shell (it's a bit more orange in person) and a black, white and turquoise print silk charmeuse for the lining. Being a New Yorker, I definitely get stuck in a rut of always opting for black. It's practical, slimming and goes with everything. But I really want this coat to be a statement piece, and what color could be more perfect for autumn in the Northeast than orange? And the turquoise in the lining really makes the colors pop. Both are from Mood.

Tuesday, September 28, 2010

Lady Grey Muslin 1.0

I always think I'm going to get so much more done on the weekend than I actually do. However, I did finish cutting my Lady Grey muslin pieces and I basted most of them together for a preliminary idea of the fit. You'll notice that I didn't bother attaching the second sleeve or the collar before donning a sweater and trying on... or pressing very well... or doing a particularly good job setting in the sleeve (the one inch allowance made it such a problem)... You get the point, this is a very rough draft.

Front

I think adding 2 inches of length above the waist was probably too much, even with shoulder pads. I am going to edit out 1/2-3/4 inch.   

 Side

Even with an enormous cowl neck sweater, the front lapels gape.There is just too much fabric above the waist.

Back

Just too big across the back, even with a chunky sweater. There is plenty of room in the bottom half, too, although I think it currently doesn't look so bad.   

Obviously, I want the muslin to have enough ease that the jacket will fit once a lining is added and I am wearing winter clothing. However, I am pretty convinced that the size 10 is too big. And since it is big everywhere, I think it makes sense to try the size 8 rather than trying to take in each and every seam. Seriously, sewing 4 princess seams with a one inch seam allowance was near impossible. I am NOT taking these seams in. 

Next steps: So, the plan is to make muslin 2.0 in a size 8, and last night I cut the pattern pieces.  I'm not much of a week night sewista, but I hope that tonight I will get to making the length alterations on the pattern pieces and start to cut a new muslin. I am not planning on re-doing the tedious method of drawing in the seam lines and enlarging the seam allowances. I just don't think I will need the extra room. OH! And I will be buying my fabric in the next day I hope.

Stay tuned...

Thursday, September 23, 2010

Epic Muslin: Will I Ever be Done?

On Saturday I got down to work on my Lady Grey Coat. And I worked on it more on Tuesday. And again last night.

My first big decision was choosing what size to make. If, like me, your bust, waist and hip measurements direct you to three different pattern sizes, you understand that this is not ever an easy choice. Should I go by my largest size (ie: hips)? That would definitely make the coat too large through the shoulders, which I find difficult to alter. Waist size? No, the waist is easy to fix if it is off. So, I decided to go with my full bust measurement over clothing, since this is a coat and will be worn over clothing - so a size 10 is what I am making.

Mirror, mirror on the wall: Am I an 8, a 10 or a 12?

I also made a controversial decision about alterations. I did lengthen each piece by 2" above the waist, which is "the usual" given my height (5'9"). BUT, Given the cut of the coat - flared from waist to hem - I decided NOT to grade the pattern out to a size 12 in the hips. I may regret this decision.

Do you think this style will hide flatter my hips?
I'm gambling on the fact that the style lines of the coat (namely, the flare) will have enough ease to fit my hips. But just in case, I've decided that I ought to do the super extended version of muslin making that Gertie posted about last week, enlarging the seam allowances to 1 inch in order to have extra room for any alterations. This is a tedious process. Very very tedious, and involving drawing seam lines onto the pattern pieces, using huge swaths of transfer paper (I *heart* the FIT bookstore!), drawing new cutting lines onto the muslin, then cutting, and finally sewing along the seam lines! TEDIOUS!!!!


My muslin pieces
Anyway, the whole point of this post is to say that by last night I was ready to commit hari-kari; I am only half way done cutting out my muslin pieces. Luckily for me, the only weapon in my home is a hot glue gun. And it wasn't even plugged in. Or loaded with glue. So, the worst case scenario, should I reach the breaking point, is that I glue my fingers together or give myself a burn on my thimble finger, so that I can't sew.

Tonight, as a mental health fun social b
reak, I'm meeting up with Erato, Terp and Poly, for a bit of fabric shopping and chat. I may even relent and buy fabric for this project before I finish the muslin. That might encourage me. Either way, I think a trip to Mood will do wonders for my own mood. Stay tuned.