Wednesday, September 28, 2016

Named Patterns: Astrid Wrapped Pants

It seems like forever ago that I sewed Named Patterns' Shane top. At the time, I loved the finished top for it's style and excellent drafting. However, everything about the sewing experience was pretty awful and annoying, from the instructions to the taping AND tracing, to only getting two sizes.


However, Named has changed all that, and I am so pleased to say that the Astrid Wrapped Pants were as much of a joy to sew as they are to wear. Hooray!

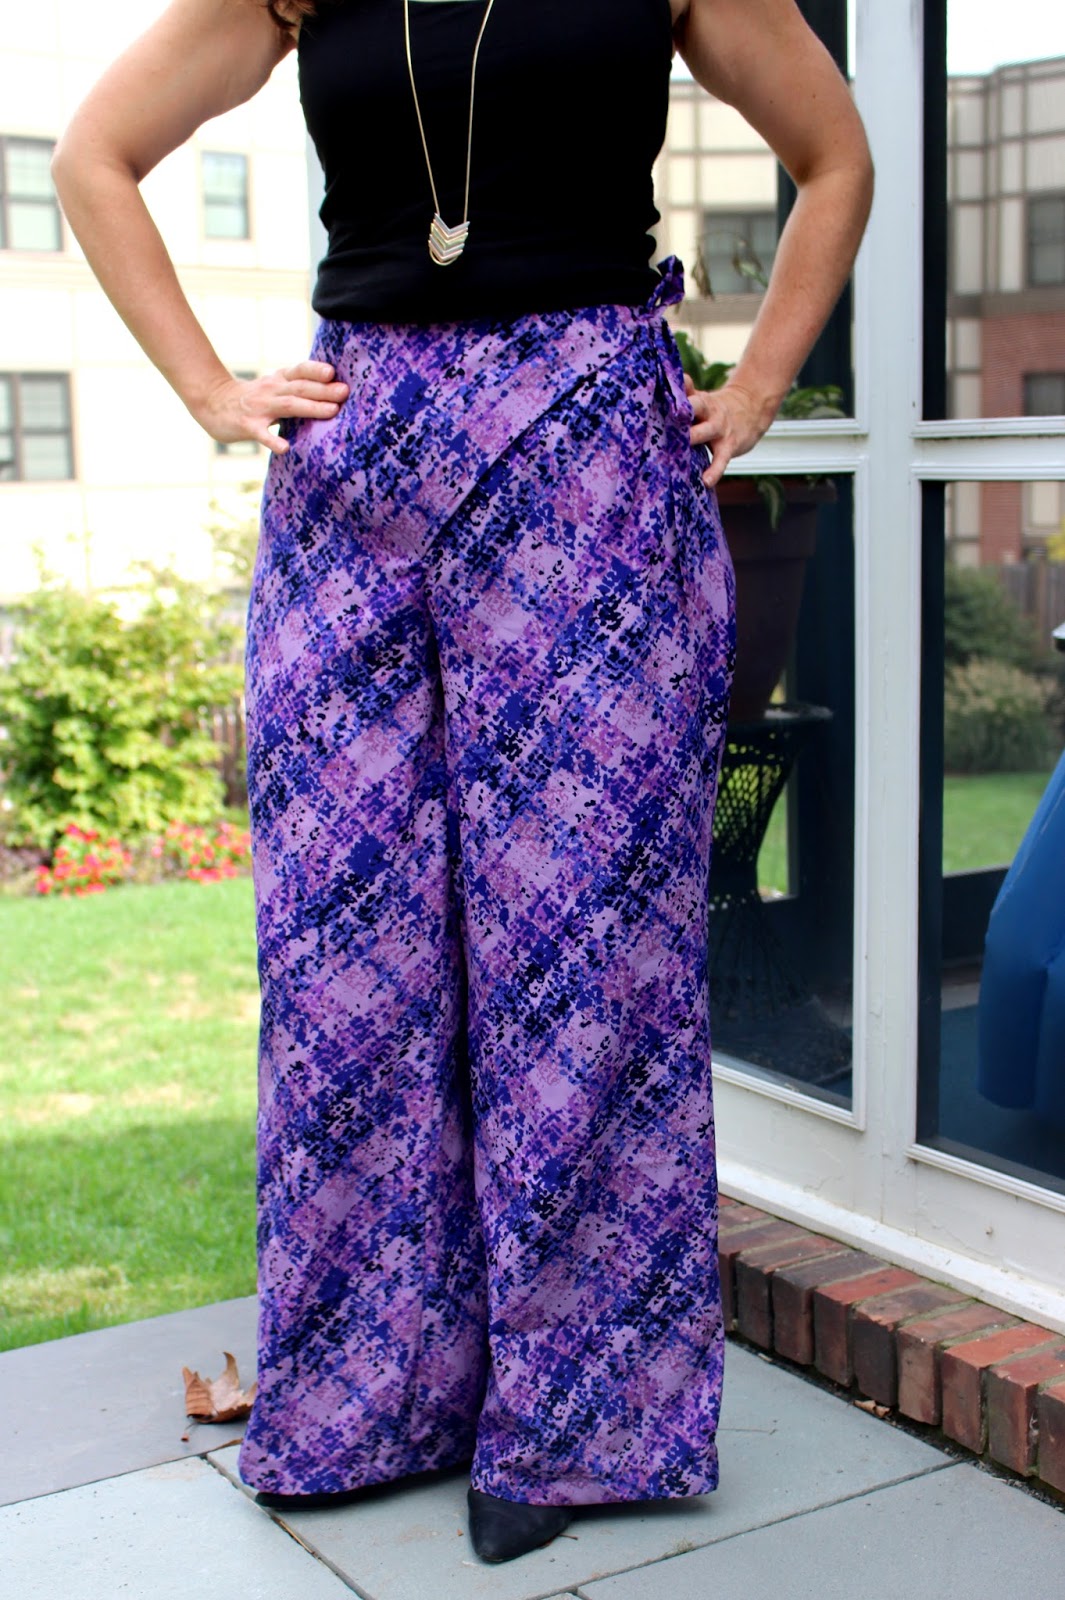
I think the style is very fun and a bit different. The legs really are quite elephantine, so it's a good thing that the waist is nice and trim, and sits a bit high. I think it's more flattering that way.


I bought the digital copy of the pattern and printed it out at a copy shop, which adds to the cost, but gives you a very sturdy pattern to work from. This is a size 10 at the waist graded to a 14 at the hips. The fit is spot on for their measurement chart, which is good to know since you are only working with a 3/8" seam allowance. Aside from grading, I made no changes to the pattern. Named drafts for a taller model and these pants were designed to be worn with heels. I actually shortened them just a bit when hemming.


If I make them again, I will adjust the crotch length and shape just a bit. There is something not 100% right about it on me. Nothing major, just needs a little tweaking.

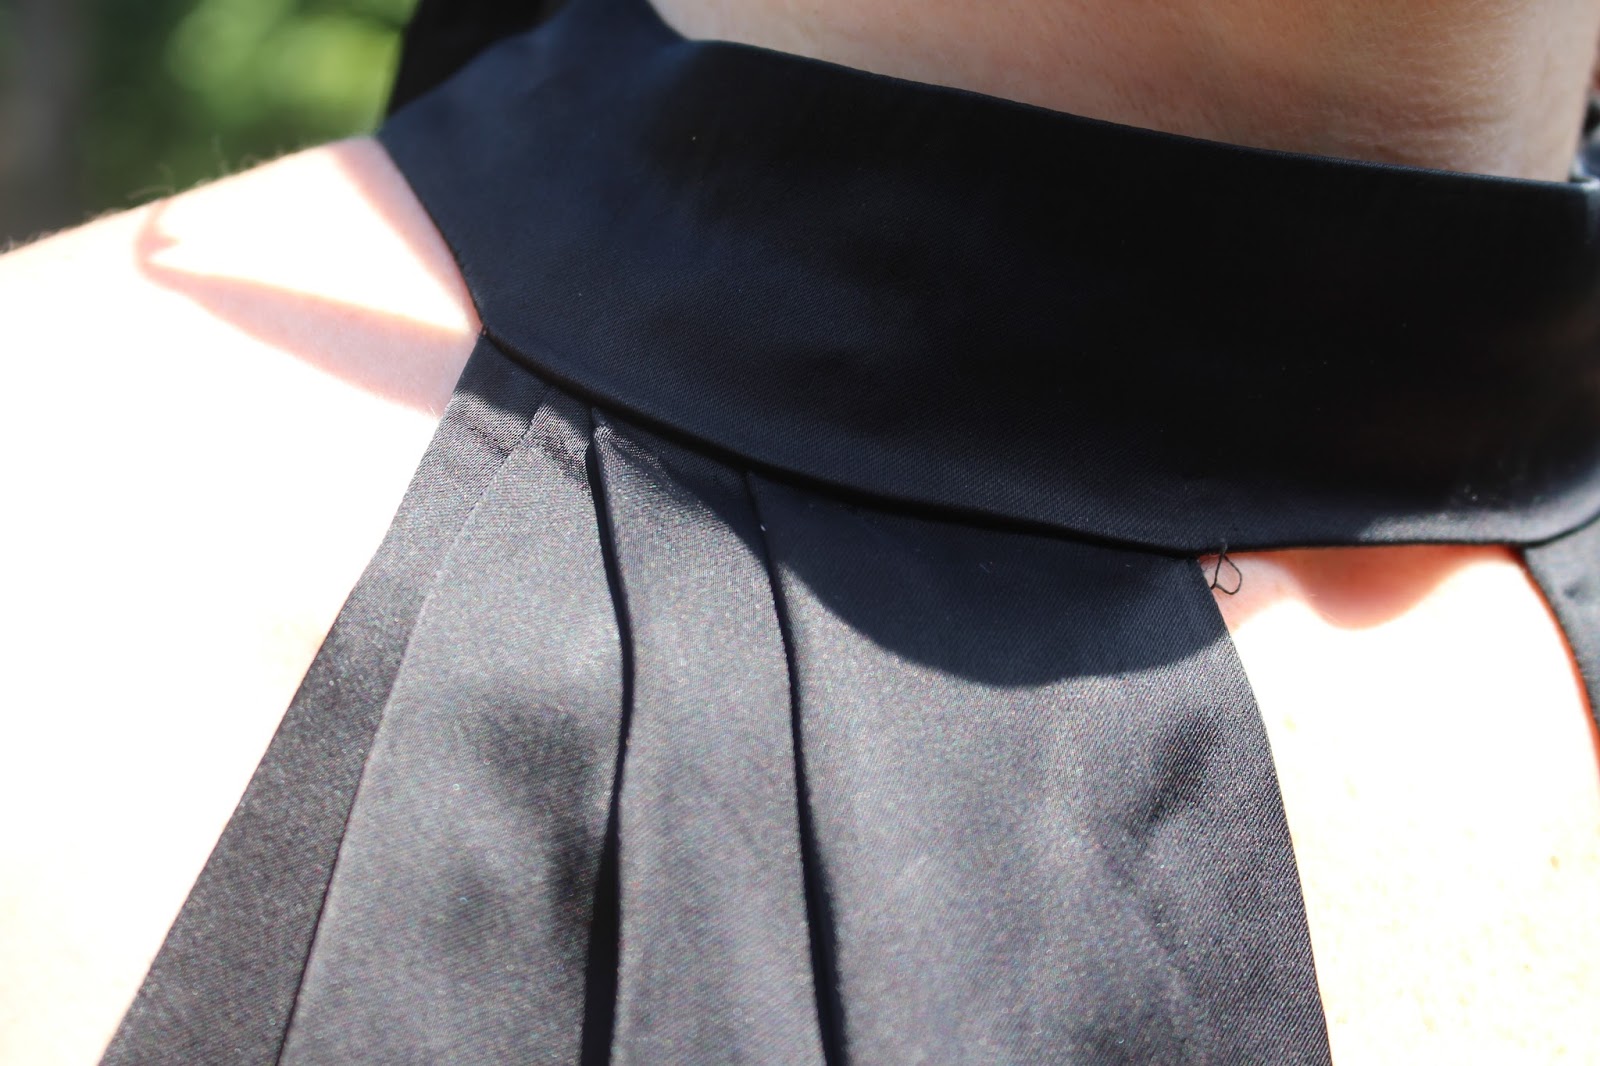
And I would consider carefully before interfacing both front wrap pieces and their facings, as the instructions suggest. I didn't consider that the wrap part of the pants - right on the tummy - ends up having 4 layers of fabric, plus 2 full and 2 partial layers of interfacing. So, you end up with the front of these pants having more body than I think is ideal considering how supremely drapey the rest of the pants are.

Wrap and tie

When I've looked at other versions of these pants on line, including the ones on the Named website, you can see that the front doesn't sit perfectly flat on the underlap area. It's not a deal breaker; it just isn't 100% perfect.


Speaking of drapey fabric, this is from my little stash of fabrics from Carolyn.  Its a poly woven that is substantial enough for these flowy, drapey trousers. It's ravel-prone, so I finished all the seam allowances with my serger. It feels lovely to wear and was just right for this project.  And the abstract print, I think, is dressy and fun.


** UPDATE:  I actually went back and made some changes to the trousers after two wears, which is highly unusual for me. First, on the aesthetic side, as much as I like a wide leg, I really felt that these were a bit excessive considering that I hemmed them for flats. In heels the proportions would likely be better, but heels are just not part of my life at the moment.


Elephantine legs

And on the technical side, the fabric I used is ravel prone, as I mentioned. This was not a problem overall since I finished all the seam allowances with my serger. However, I trimmed the seam allowance back to reduce bulk on the inside of the hems (ie: where you fold the hem up), and those trimmed back seam allowances completely frayed right thru the seams. So, the seams at the ankle beneath the hem stitching was totally shredded. So, thank goodness the legs were wide enough that I could take them in by an inch on both the inseam and outseam, removing 4" of circumference. All of the pictures in this post are from after I made the changes.

Wednesday, September 21, 2016

True Bias Ogden Cami: You Know You're Obsessed When...

I may be just a teensy little bit obsessed with the new True Bias pattern, the Ogden Cami.


Ogdens all in a row


I am not usually one of the first people to sew a pattern, but this cami literally made me drop everything and sew it. Again and again - in cotton batiste, Liberty Tana Cotton Lawn, silk charmeuse and silk chiffon. It really filled a hole in my pattern library for a simple, well fitting cami.


Worn with my Jean-ius trousers

My first version was meant to strictly be a muslin since I was testing the results of an FBA, which you can see below. I decided not to rotate the darts out - I just feel like I get a better fit with darts entact somehow.

Test version in cotton batiste

My test version fit so well that I decided to finish and wear it. Batiste is so light and airy on a sweltering summer day, and I recently discovered I have yards and yards of white batiste in my stash for some unknown reason.

Happy with the fit, I moved on to a remnant of Liberty of London 100% Cotton Tana Lawn. One of the great things about this pattern is that it doesn't take all that much fabric. It's perfect for using up the odd yard+ of fabric or for using a precious/expensive fabric that you don't want to buy too much of.


Liberty version

Next I sewed the purple and black charmeuse version, which I have not done a photo shoot for. It feels luscious on.


Sorry for the i-phone photo


My fourth version is in silk chiffon lined with china silk. Since the chiffon is sheer, I simply used the main pattern pieces to make a lining instead of using the facing pieces.


This one was a little challenging to hem. After a few failed attempts at a machine sewn narrow hem, I took the suggestions of some Instagram friends and did a hand rolled hem - my first, if you can believe it. It's a really sweet finish for this top.


I love that the back is fairly low, but not low enough to reveal one's bra band. Hooray! I love a top with great back.


I love a top that gives good back!

You might think that I would have stopped there with the Ogdens, but I didn't.  As if four wasn't enough, I also used the pattern to rescue a UFO.

Two years ago I started sewing the Future Dress. Christine of Seamwork Radio had posted a tutorial to this Claire McCardell classic 1945 dress on her blog, Daughter Fish. It seemed simple enough even if it did take miles of fabric.  But making the straps was kind of fussy and I was pregnant at the time. I really needed to move on to sewing things I could wear to work, and the idea of hemming all those miles of rayon challis after all the time I had spent sewing french seams... I just didn't have the will power and set it aside. But I pulled it out this summer and fussed some more. However, getting the armscye's and straps right still seemed fussy, and at this point I was starting to mangle the fabric. So, I decided to scrap the original neckling/strap/armscye configuration and McGuyver the whole thing into a bias cut trapeze Ogden maxi dress.


I'm totally in love with its swishy perfection, although I need to shorten the straps just a scooch.


Anyway, Ogden love is going strong over here in the Craft Lounge. I have a feeling that now when I want to sew with a fabric that doesn't really go with the rest of my wardrobe, I'll just whip up an Ogden to go with it. It's so easy to sew and, as always, Kelli's instructions are thoughtful and clear. Plus I have several more ideas of what I want to do with this pattern - like cut it on the bias for a slinkier fit, sew it in a knit as a pj top or lengthened to be a night gown, or make Ogden slips for layering in the winter. But at this moment, I am going to embark on some unselfish sewing and a few other projects to clothe my lower half. But it feels nice to have a go-to pattern like this.

Do you have a TNT like this? A versatile pattern that fills that critical niche? Do tell!

Wednesday, September 7, 2016

Foxy Lady Tux: M7366 Review and FBA

Several weeks have passed since I was out on the town in my sexy spin on the lady tux. So, it's about time I did a little review and show you how I did an FBA on the top. 


As a reminder, the pattern is McCall's 7366, a jumpsuit with bodice and length variations. I sewed version B. 

First, let me just say that if you - like me - are a regular BMV sewist and normally go down a few sizes from the envelope measurements because you are used to a lot of ease in their patterns, just stop and heed my warning. This pattern fit according to the envelope. For my first muslin, I used my regular BMV size and had to do a wiggle dance to get it over my hips. There was no way I could have zipped it up. However, a few muslins later and the fit was great!


Front View


And peek-a-boo back


And that is the thing with view A and B of this pattern. For a trim fitting jumpsuit that has a neckline that plunges almost to the navel, fit is the thing. You don't want the neckline to gape and risk a wardrobe malfunction. I found that the torso length and the right amount of ease in the legs were both important to fit and comfort. If the torso is too long, you will get gaping down the neckline - no bueno! If it is too short, particularly on the back, you won't have enough ease to sit down without the collar pulling and choking you  - really no bueno! And the leg ease is important so that when you sit, it isn't binding, but yet has a slim fit. I'm actually surprised that the fabric recommendations did not include stretch woven fabrics for this reason. 

Let's talk about the bust fit. Here is my altered pattern piece.  


Alterations


In addition to my normal 2-3 inches of length, I need about 2 extra inches total across the bust these days. On a top like this, which is split down the middle, the temptation might be to skip it. But you really don't want to have the fabric bowing out at the fullest part of your bust or have gaping or pulling there. To avoid any wardrobe malfunctions, you want a enough coverage across the bust and just enough - but not too much - length from neck to navel to keep the neckline pretty snug to your chest. This pattern is drafted with two pleats at the neckline on each side. This made the FBA easier than you might think. I added the extra width I needed down the whole length of the bodice (you can see how I did it in two places which sort of helped me keep the grainline sane) and, instead of adding a dart, simply added a third pleat to eat up the extra fabric at the neck. 


Third Pleat


I also reshaped the side seam at the waist. To complete the FBA, I needed a bit more length at the center front, to go over the bust. I added a little wedge to lengthen the neckline without lengthening the side seam. This makes the neckline slightly bent. But because my body is curved, the neckline actually appears pretty straight on me, without much in way of bowing. Aren't optical illusions great? 


As for the rest, I just played around with the length and width of the pattern until I achieved a fit that worked - there was no magic there, just some trial and error sewing. 

I really loved this pattern and my tux. The only two style changes I made are that I decided to eliminate the pockets for a slightly sleeker look and I changed up the cummerbund/belt a bit.  Honestly, the belt was the one part of the pattern that I didn't muslin and the one part I was disappointed with. I would do it completely differently next time. It's basically a straight (not curved) inside piece with a bias cut outer piece that is meant to drape into the pleats you see. I am very curvy at the middle and the straight cut just didn't work on me - it kept either riding up or slipping down. You can see that I changed the closure from hook and eyes to two ties so I could better adjust the fit, but even that didn't really help. In the end I tacked the belt to the center front and at the side seams so it would stay in place. Also, the bias draping really didn't work without a lot of adjusting. Perhaps it's my fabric. But to do again I would opt for a more complicated belt with shaping and pleats. 


Speaking of fabric, this is a GORGEOUS viscose satin that I picked up at Mood. I didn't want to spend a fortune on silk or be all sweaty in an unbreathing sweaty poly.  For $18/yd this was the perfect thing. It looks and feels really luxe, was beautiful to sew and I was cool and comfy even on the dance floor.  Oh, and I did in the end choose to make the side stripes out of faux leather rather than sequins.


And that is it with fit and alterations!

This style is not for everyone, but I think it strikes a good balance of being sexy, thanks to the neckline and peek-a-boo back, without being trashy thanks to the fuller, more modest side/armscye coverage. With that much front cleavage, I wouldn't want any kind of side-cleavage or a short hem or a skin tight fit. My personal sense of how to be sexy, but not trashy is to go sexy in just one area at a time (ie: sexy cleavage OR hemline OR body con fit, but not more than one at a time). And this pattern fits the bill. So, good style and drafting decisions, McCalls!


I really hope I have more occasions to wear this tux.  I do love a great dress, but this was more comfy and I felt unique and chic and a bit daring in it. And once I worked out the fit, I really did feel secure and not at risk of any wardrobe malfunctions on the dance floor. For a black tie optional wedding, where I really didn't know how formal most guests would be, this was just the thing!