Wednesday, July 27, 2016

Sister Sewing: Cashmerette Upton Bodice

Today, I'm doing a little bit of blogging catch up. 

Here are a few pictures of my beautiful sister, Poly, in her sari with the bodice I sewed for it. 


When I delivered the blouse, I thought how great it would be to take pictures of it actually being worn with the sari, instead of staged shots. I realized too late that you really can't see much of the bodice under the sari. Absolutely fine since its' supposed to be an accessory to the sari, but not so good for photos. 


Anyway, this is the bodice portion of the Cashmerette Upton Dress

Cashmerette Upton line drawing

I could not be happier with this beautifully and thoughtfully drafted pattern. It was the perfect canvas for the changes needed to convert the bodice into a sari blouse. I used only the bodice pieces of the pattern; the scoop neck for the front and v-neck for the back. I lengthened them both by 7 inches so that they would be waist length as my sister requested. This required me to lengthen the darts. What worked best was sewing a muslin with lengthened darts and then doing a little pinning. Another design change that I made was to relocate the zipper to the side seam and cut the back as one piece by trimming off the seam allowance and cutting the fabric on the fold.

At this point, I should mention - and by "mention" I mean bow down and kiss Jenny Cashmerette's feet and then sing songs of praise - how easy it was to fit my sister's bust. Holy guacamole, those separate pieces for different cup sizes was a life saver! Between kids and work, we didn't have a lot of time for fittings and multiple muslins. It was a relief that muslin 1.0 fit with just a few changes.  Aside from a little adjusting of the darts, the only other fitting change was pinning a little bit out of the back neckline. Like me, my sister's upper back is rather narrow. We did a second fitting - this time of the basted together top.  All I had to do was tweak the darts slightly and mark the hem.  

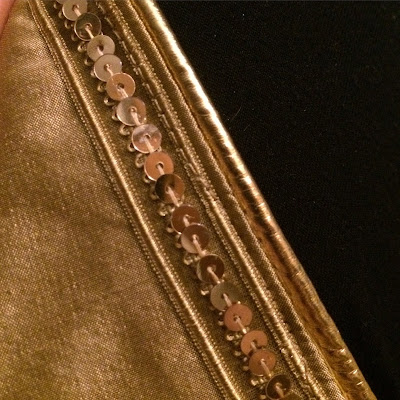
I sewed the blouse  in a beautiful gold silk taffeta from Mood Fabrics, which I finished at the neckline and armscyes with gold piping and sequined trim. When it comes to sari's and sequins it seems like "more" is the way to go. 


I should have taken a few pictures of the top on a hanger, but I just didn't think of it.  So, you'll just have to cope with a few more sari shots. 


Sari, not sorry. 
It was so fun to be in a sari for the wedding festivities. I think my sister looked positively regal in royal blue and gold. Don't you?

And I was glad to have a chance to sew a Cashmerette pattern. I've heard such good things about them - all true!

Thursday, July 14, 2016

Foxy Lady Tux

If you are ever invited to an Indian wedding - or have an opportunity to crash one - you should go. We had a sensational time last weekend at my cousin's wedding. Here I am with my sisters in our saris. That's my dad in the middle. I wish we had gotten my mom in the shot, too, but she was behind the camera.


But that's not why you read my blog. It's for the sewing. I'll do a pattern review of my foxy lady tux (aka McCalls 7366) with staged shots in good lighting so you can see the details as soon as I can, and I will include how I did an FBA on the top so that there were zero wardrobe malfunctions.

To whet your appetite, here are some shots of my tux in action, which are a bit blurry and dimly lit - such is the nature of cell phone shots.  I'm not sure why half of them were photographed square. If you follow me on IG, you've already seen many of these. Overall, I'm really thrilled with how my tux came out and I felt tres sexy at the wedding reception.


From below: On the way to the reception

From above


My uncle (l) and dad (rt) in their kilts.


The one I'll show people when I am a decrepit old lady

Apparently, 40 is not to old for your parents to disapprove of what you are wearing. They both chose to compliment my hair instead of commenting on my attire. hee hee hee

Anyway, it was a wonderful weekend, but it was nice to be back to our normal routine after all was said and done.

Exhausted parents + one energetic toddler


Wednesday, July 6, 2016

Here Be Dragons... the Socks

Wow, these socks really took forever...


... by which I mean more than 2 months. I started them when it was still cool enough to wear wool socks.

This is the Here Be Dragons sock pattern by Rachel Gent for Knitty. It's supposed to look like dragon scales, I suppose, but you can be the judge. One thing that I like is that the sock was designed to be knit toe up and has some very cool details.

I like how the lace chart starts near the toe, adding a distinct widow's peak to the sock. However, I did change the toe a bit to make it less narrow by casting on more stitches and adjusting where I started the pattern chart. You can see how narrow the toe is in this picture.

Right before frogging

After a quick try on, I decided to frog and start over. Not only was the toe really narrow, but the sock was too big overall. A smaller needle and some additional stitches and I was back on track.

So, that set me back a bit, but the real hold up was that each time I got to the heel, I ran into troubles. I ended up ripping out and reknitting the heel flap 3 or 4 times on each sock. You would think that I would have figured it out after having successfully done it on the first sock and taking notes. But no. However, it is a pretty cool detail of the sock that the pattern bleeds into the heel flap.


I had trouble where you have finished the heel flap and start knitting full rounds in pattern again.While they were correct, the instructions could have been more clear. That said, I soldiered on and did get thru it.

Next, on the ankle of the sock you are instructed to just keep repeating 10 lines of the 20 line pattern chart, but I decided that I liked the full pattern and so did all 20 lines, keeping that diamond pattern going.


Lastly, I like the twisted knit stitch of the ribbed cuff. It crowns the sock nicely by making the rib slightly more dramatic.

Anyway, I am happy with the results, but not with the 9 weeks it took to knit these socks during my 3 day a week commute. I tend to oscillate in my sock knitting between doing more and more complicated patterns until I get frustrated with how long they take, and then more and more simple patterns until I get bored, and then back the other way. However, I'm glad these complicated socks are done! And I look forward to wearing them, although probably not until temperatures cool again...


PS - I am in the home stretch with my lady tux - a good thing since the wedding is on Saturday. And my sister's blouse has been delivered to her. Stay tuned for reviews and photos!