Showing posts with label In the kitchen with Phineas. Show all posts

Tuesday, April 3, 2018

A Little Kitchen Cuteness

Wow, I think this is the longest gap I've ever had in blogging.  It's been a brutal winter. Thank goodness spring is here or at least here-ish.

This is a little project that I did for Christmas, when I was in between bouts of kiddie germ illness and wanting a fun and easy sewing project.

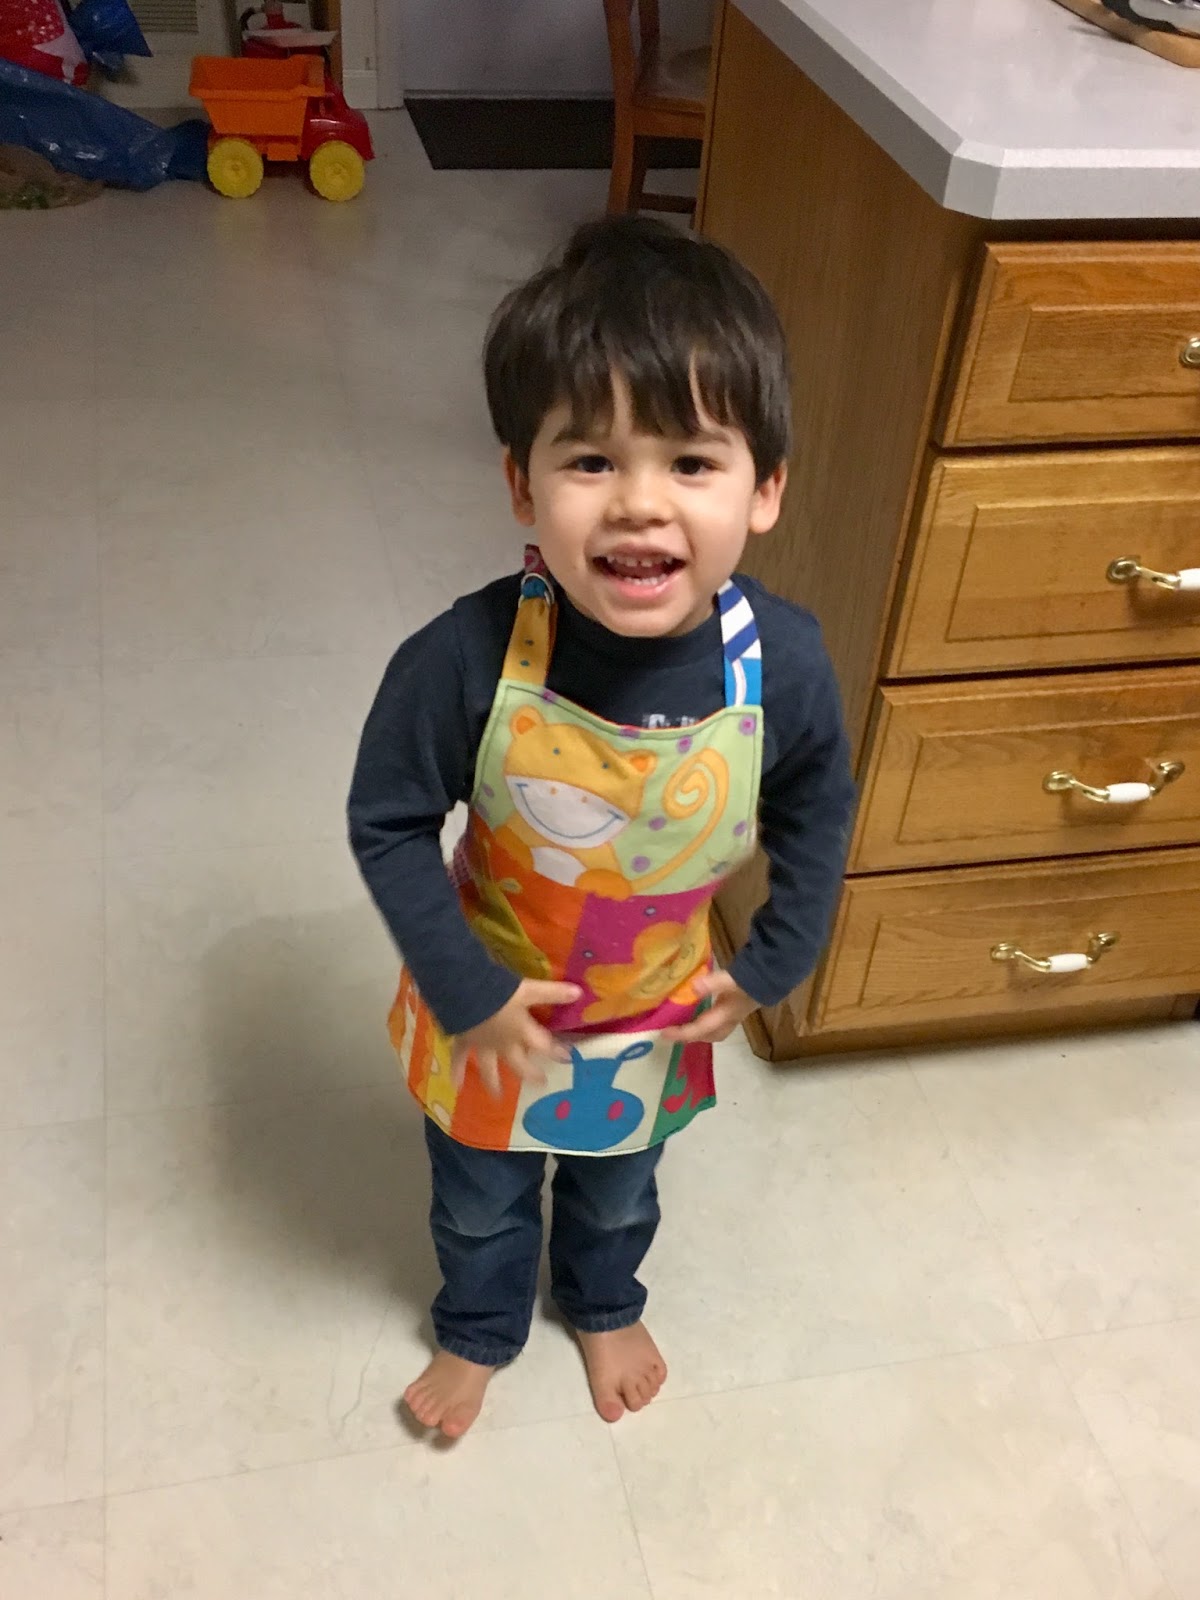
If you follow me on IG (cliophineas), you will know that Taco and I like to bake together. It's a messy hobby and I haven't been able to find an apron small enough for him that I thought was also cute available commercially. So, I sewed this apron for Taco as a Christmas gift to go with a tiny chef set.


I drafted the pattern using a tutorial on Craftsy (here), but made it shorter and narrower than the instructions called for. Also, I modeled the straps after grown up aprons that we own using D-rings rather than an elasticized strap as the tutorial instructs.


Also, I disregarded the sewing instructions so that I could make the apron reversible. The side that Taco seems to favor has animals, and the opposite side is orange with a zebra pocket.


These cotton fabrics have been in my stash for so long that I really can't tell you when or where I got them.  I know that the faux-applique look animal print was purchased long before Taco was a consideration.  So, I'm happy to finally sew something with it.

Overall, this was the perfect project right when I was wanting to sew during the plague-ridden, exhausted winter holidays but didn't feel up to fitting or complicated projects. And, I was so happy with how this came out that I immediately sewed a second one for Taco's cousin who is eight months younger.

Ok, enough me. Here is Taco, helping Phin make pizza on a Friday evening.


And here are a few from Saturday, when we dyed Easter eggs.


He seems to like his new apron and insists on wearing it whenever Phin or I put on aprons, ourselves.

Monday, September 30, 2013

Will Knit for Pizza: Socks for Phin

As frustrating as it is to be away from my sewing machine when I travel for work, it's nice that my knitting can easily come with me. And, although I like travel, the very best part of any business trip is the joyful homecoming at the end.

One of the ways that Phin lets me know I've been missed is dinner. This week, he spoiled me with pizza. And I'm spoiling him with hand knit socks.

My sock blockers are too small for his socks.
 
Better on.

The knitting deets: These are completely frankenpatterned.  The cast on, toe, sole and heel are from the Manly Aran Socks from Toe-Up Socks for Every Body, except that I did an eye of partridge stitch on the heel. I think it makes a stronger heel, which also looks good. The ribbed wave pattern on the insole and ankle is "Surfin'" from Socks a la Carte. I made a simple k2,p2 rib cuff and bound off with Elizabeth Zimmerman's Sewn Bind off, which is very stretchy. Perfect for socks.


Surfin' wave pattern.


I should note that there is a small but crucial mistake in the Surfin' pattern. The M1 stitch (make one) should actually be a kf&b (knit front and back). It's incorrect in both the chart and the written instructions. The pattern simply won't work if you follow what's written. Once I figured this out (thank you, Ravelry), it was smooth sailing. This was a very easy pattern.


Smooth sailing with Surfin' Socks.


Anyway, as I mentioned, my welcome home dinner was pizza. Figs were ripe at the farmers market, and so Phin made a fig and goat cheese pizza with serrano ham and arugula on his homemade crust.


Fig, goat cheese, serrano ham and arugula (aka rocket)

Homemade pizza is easy and delicious. Most Fridays, it's what's on the menu, although fig and goat cheese is a bit more gourmet than our usual toppings.
Phin's Pizza Dough

15-16 oz flour (we use half white whole wheat and half bread flour or AP)
1 cup or so of warm water
1 1/2 tsp yeast
2 pinches of salt
large glug of olive oil
Add all ingredients to stand mixer with dough hook attachment. Mix until dough pulls away from the side of the bowl (2-5 min) -it should be slightly tacky. Turn out onto a floured surface and knead a few times, shaping into a ball. Let dough rise in a warm place in a greased bowl covered with a tea towel for 3+ hours (until you are ready to use). When you are ready to make pizza, cut ball in half and stretch dough into the shape and thickness you like on a sheet pan. (You can freeze the other half.) Top as you please. Bake in 450 oven, rotating pan once, until as crisp as you please (We like thin, sort of crispy crust and bake for 14 min total).

I know, there are a number of variables.  But you get the hang of dough by doing. If you want to make sure your pizza is cooked, use a spatula to lift up an edge and peek underneath to see if it is browned. Whatever toppings you choose, I strongly recommend a blend of fontina and mozzarella for the best flavor, and top every pie* with a sprinkling of Parmesan or other salty hard cheese.  


Mmmmm...pizza...


I'm not sure which of us gets the better deal in the "he cooks, she knits" balance. But this past week it was nice to be home, spoiling each other. 


* Pizza comes by the pie or the slice in NYC.

Wednesday, June 26, 2013

Berry Bounty

So, I mentioned that Phin and I went strawberry picking over the weekend. It was hot and sweaty work, but very rewarding. Farm-picked, ripe, local berries smell and taste unbelievably good. In fact, they taste like strawberries, unlike the mutant-sized cardboard-like berries that you can get at the supermarket most of the year.


Fleeting berry perfection

Just look at these perfect jewels!

Anyway, given that berries that are picked when they are actually ripe have a very fleeting shelf life, both Phin and I had big and immediate plans for our berry hoard, which also included raspberries and blueberries that we bought at the farm stand.


Phin's lovely Bumbleberry Tart!

Phin made a Bumbleberry Tart. I helped by making a Pate Sucree crust, which he filled with a freshly made blueberry compote and then topped with a crown of fresh berries. No recipe was used.

Since it's officially summer, I decided to pull out the ice cream maker. Last year I made, but did not blog about, Strawberry Sour Cream Ice Cream. So, here it is.

Strawberry Sour Cream Ice Cream!

1lb strawberries, hulled and chopped
1Tbsp vodka (or other liquor)
3/4 c sugar
1 cup sour cream
1 cup heavy cream
1/2 tsp lemon juice
Optional 1 cup sliced berries to mix in at the end 

Stir sugar and vodka into the strawberries and leave it macerating for an hour. Or do like I did and stick it in the fridge overnight. Puree the strawberry sugar mix with the sour cream, cream and lemon juice. Chill thoroughly and churn according to you ice cream maker directions, adding in the optional berry slices near to the end. Do your best to resist eating all the ice cream right out of the machine. Fini!
This recipe, which is from my favorite ice cream book, The Perfect Scoop, was designed for mediocre, supermarket berries. So using perfectly ripe and flavorful berries made this ice cream explode with strawberry flavor. And the sour cream adds just the right tang to make sure it's not cloying.


After a very sweaty 5k trail run at a historic farm nearby, this was dinner last night. Seriously folks, I ran a personal worst 5k time. It turns out that I like the idea of trail running much more than I actually like running cross country, but what really did me in was the heat even though I was well hydrated. Live and learn. Ice cream was the perfect tonic.


Essence of Strawberry...mmmmmm

And everything tastes better when served in a pretty champagne glass, no?

Thursday, September 13, 2012

Double Trouble: Apple Edition

I was going to start this post with a happy little story about apple picking with my nephews last Sunday. But it's been that kind of week here at Clio & Phineas, and the week isn't even done.

At the same time some of you were emailing to say that my blog was setting off the malware alerts, I was in the kitchen baking with my annual apple picking bounty. I wanted to try a new-to-me recipe, and Phin selected the Bolzano Apple Cake from The Essential NY Times Cook Book - which is a fantastic compendium. (recipe below).

In truth, I should have known that something would go wrong when the recipe was described as a clafoutis. You remember my first attempt at clafoutis, don't you? The one that will forever be known as Zombie Pie? Well, there have been several more attempts to master clafoutis. All equally unsuccessful. Anyway, things were going just fine up through the first five minutes of baking. Then I started smelling something that reminded me of burnt pancakes. NOT good! When I checked the oven, it turned out that my spring form pan was leaking batter onto the bottom of the oven.

When good cakes go bad...

Seriously, what is it about clafoutis?!?!?  I did manage to get the pan out of the oven and onto a baking sheet, where it continued to ooze. Once the oven was clean and re-heated, and the cake had been transferred to a cake pan, I put it back in the oven. This is not a strategy that I endorse, but what choice did I have? I was not expecting good results.

But I was pleasantly surprised!


Look at how brown and lovely my cake is! And thanks to parchment paper and a very generous coating of butter and flour, I was able to get it out of the (non-spring form) pan without mutilating it.

Phin was pretty wild about this cake. It's actually much more tart-like than cake-like, with layers of thinly sliced apple held together with a minimum of lightly sweet, eggy, buttery crust-like cake. Right up Phin's alley. For me it was a bit eggy, but still enjoyable. And we both agreed that a dollop of whipped cream would be the perfect accompaniment.


Layers of apple..mmmmm....

I think Phin is already angling for me to make this again, since it's all gone. (If he is smart, a new spring form pan will magically appear in my kitchen.) And to be honest, this is exactly what I would make for family, company or just for myself if I wanted apple pie without the hassle of making a crust. Plus, the recipe seems to be fool-proof. So, two thumbs up, despite my equipment fail and near disaster.

Bolzano Apple Cake

8 tbsp butter plus extra for greasing pan
2 large eggs
1 c sugar
1 vanilla bean, split, seeds scraped out
1 1/4 lbs apples
1/2 c flour
2 tsp baking powder
1/2 c whole milk at room temp

Heat oven to 375. Melt butter in sauce pan and set aside. Beat eggs with half the sugar. Gradually add rest of sugar while beating. Batter should form a ribbon when dropped from a spoon. Add vanilla seeds to batter and bean to cooling butter. Peel, quarter, core and thinly slice apples. Remove vanilla bean from butter. Stir butter into batter. Combine flour and baking soda. Stir into batter alternately with milk. Stir in apples, coating every piece with batter. Pour into parchment lined, buttered and floured 8" spring form pan. Bake for 25 minutes. Rotate and bake for another 25 min. until cake pulls away from the pan and is brown on the side. A knife inserted into the center should come out clean. Cool for 30 minutes and then unmold. Serve warm with a sprinkle of confectioners sugar or dollop of whipped cream. 


om nom nom


Wednesday, March 28, 2012

Mac + Cheese: Molto Italiano Edition!

So, here I am in Montreal, the city that inspired my quest for the perfect mac+cheese two years ago. I haven't posted a new mac + cheese recipe in aeons, and I have not yet succeeded in finding that perfect recipe.  That's partly because Phin, who can only take a little cheese, basically begged for mercy.  So, I was totally surprised recently when he announced that he would be making  mac+cheese while I was busy sewing.


The recipe that he picked out, Mario Batali's Ziti al Telefono, is really the love child of the classic Italian-American baked ziti and a mac + cheese. What's not to love? Why it's "al telefono" is a mystery to me. Maybe because it's so good you want to call your friends and gloat. Who knows?

What's unique about this recipe when seen from the ziti point of view is that you make a Bechamel (besciamella) sauce for it.


What's unique when seen from the mac + cheese side of things is that you make a basic tomato sauce for it.


Then you basically blend the two together, add a bunch of mozzarella and bake it until bubbly, like both ziti and mac+cheese.


We also added some meatballs and sausage (Phin is a carnivore at heart.)


Top with some cheese and bake until bubbly. 


And then you tuck in to a big warm bowl of the stuff. I have to say, this was definitely the best ziti I've ever eaten. It was creamy and rich without being too heavy and cheesy. It definitely wasn't a classic mac + cheese, but it absolutely satisfied that craving for warm cheesy goodness.


So, consider this your call to try this recipe! 

I'm hoping to get a bit of fabric shopping tomorrow if work permits. Stay tuned! 

Tuesday, January 12, 2010

C is for Linzer Cookies!

Courtesy of NY Magazine

Since the compliments keep pouring in for the Linzer Cookies that Phineas and I made for Christmas this year, I thought I would share the recipe.

Phineas and I have very different cookie sensibilities. I like drop cookies, preferably with chunks: chocolate, nuts, dried fruit, etc. In my cookie-verse, even meringues have chunks, and rolling pins don't come into play. Phin, however, leans toward sugar/butter/shortbread-type rolled-out cookies instead. So he set out to make Linzers as his addition to our Santa's Kitchen treats.

The evening he planned on making the cookies, he was a bit under the weather and rather tired, and Linzer cookies are a big project for a cookie. A few minutes in the kitchen produced a series of clanks, crashes, curses and other odd noises which are generally incompatable with good cookie making. So we decided that it was a two person project. Ultimately, I made the dough, Phin rolled out, cut and baked the cookies, and I finished up by icing (jelly-ing really) under his supervision.

Anyway, here is the recipe, which came from NY Magazine. Phin cut it out when it origially appeared. Our only change was that we did some raspberry and some blackberry filled cookies. Enjoy!


Monday, December 14, 2009

Santa's Kitchen 2009

Peppermint bark, peanut brittle and chocolate truffles.

This weekend, Phineas and I powered through our holiday candy making. It went pretty quickly. Even the truffles, which are usually a pain, went smoothly.

Spurred on by my candy-making success, I ventured another try at spiced nuts. Last year, Erato told me that she really liked my first batch once she added more salt to them. So, that is what I did. Naturally, I over-salted them. Sigh. So, I have assigned holiday spiced nut making to Phineas. Possibly permanently.

Wednesday, November 18, 2009

Freeeeeeeeezer Funnnnnnnnnnnn!!!!!!

Phineas here. As you may or may not know, I will freeze anything! Chocolate, taters, pies, dumplings, you name it and I 've frozen, defrosted and eaten it . When you don't want to cook, it's nice to just reach in the freezer and have a yummy meal in minutes. So the latest version of freezer-to-table cooking involved some short ribs that I braised a few weeks ago but, because of our schedules, never managed to eat. Into the freezer it went! Wanting something different than the usual short ribs with mash (we just had our pre-Turkey Day turkey the night before), I decided to make some quick short rib ravioli.

First, I made fresh pasta dough and rolled it out into sheets for the ravioli. (I know this is not exactly fast, but wonton sheets from the supermarket will also do just fine.)


While resting the dough, I shredded and reheated the short ribs, reducing it in its sauce until it became the consistency of sticky Sloppy Joes (hmmm... now there's an idea!). Next up, fill the wonton/ravioli and cut to size. No directions here, but you can make them as big or as small as you like. Let them hang out while you boil some agua and make a quick sauce.


Tonight's sauce was sauteed garlic, shallot and mushrooms tossed with butter and roasted grape tomatoes (1. cut up a container of tomatoes, add some chopped garlic - season with salt and pepper and drizzle with a healthy dose of oil/your choice 2. place in a 300 or so degree oven or toaster oven 3. stir every so often until it becomes a sticky reduced chutney-like substance 4. use in recipe or put on sandwiches instead of yucky out of season tomatoes or mayo, which is super-yucky in Clio's opinion).


Cook the ravioli, toss in pan with sauce and voila dinner is served!


P.S. Easier version (assuming you have cooked short ribs around) : Cook up sauce. Add reduced and shredded short ribs. Got a bag or frozen peas? Toss a handful of those in to heat through. Dress your favorite fresh or dried pasta (papparadelle would work great) or frozen cheese ravioli. Shower with parmesan or pecorino cheese and eat!

Friday, October 23, 2009

Married to Mr Freeze (For Mar-Mar)

Last night I has a long chat with Mar-Mar. You see, for various reasons she ended up agreeing to host her family's Thanksgiving at her home while nearly 9 mos pregnant. (Don't ask.) So, she has questions about how much she can make in advance and freeze. Little did she know that I am married to Mr Freeze himself.

From the NY Times article on freezing food.

Earlier this summer, when Mark Bittman wrote an article about how you can freeze most food, Phineas' response was a smug "well, duh!" He will freeze anything. And by "anything" I mean he has frozen all of the following: couscous, beans and lentils, cookies, mashed potatoes, tomato paste, habanero peppers, birthday cake, blueberries, nuts, fresh ginger, cheese, white rice... the list goes on. Actually, in addition to all kinds of meats, dumplings and breads, this is basically what's in the freezer right now (the cake in question is chocolate mousse cake from my birthday.) Between the freezer and pantry, Phin and I could easily survive a 6 month siege by brain-eating zombies before turning to cannibalism. But I digress.

Anyway, in going through the list of everything that Mar wanted to serve, aside from the turkey (ie: stuffing, mashed potato, gravy, squash soup, veggies, apple pie, pumpkin pie) there is only one item we were unsure of freezing: Pecan Pie. However, according to Nestle.com, it's fine. And this truly tickles me, since I have already invested lots of time experimenting with pecan pie. So, naturally, I am now feeling like I should make extra pecan pies this year so that I can cut them into single servings and freeze them.

Gosh, Mar. We really are bad influences on each other! Happy Friday, everyone!

Friday, October 16, 2009

Want Fries with That?


After my birthday dinner, I chastised Phineas for not making enough oven fries to go with his Oktoberfest menu of sausages and fixings. He protested that he had made a whole 5lb bag. "Impossible!" I told him.

It was not until I was hanging out with Magenta and Dr Kiang that I learned the real truth. Apparently, the potato wedges were a (silent) big hit and all five pounds were gobbled up. I guess I hadn't thought about how much time and how many batches it has taken for me and Phin to really perfect our method of getting oven fries that are crispy and delicious. So, since M and Dr K demanded that I reveal "the secret", here it is.

Crispy Oven Fries "Secret" Method
  1. Place a large baking sheet in the (cold) oven and heat the oven to 400 or so degrees - you want it hot!
  2. Prep potatoes: Cut up your spuds (Phin likes wedges best because then you can get them browned on the 2 cut sides)
  3. Dress spuds: Toss with oil (I use canola), generous amt of salt and whatever herbs/seasonings you want (garlic, rosemary, pepper, paprika, etc).
  4. When the oven is heated, take the scorching hot pan out of the oven and give it a quick spray with Pam or other cooking spray. Arrange potato wedges with one cut side down (they should sizzle a little when they hit the pan).
  5. Bake for 20 min until browned on one side. Flip to other cut side. Bake for additional 15 minutes or until nicely browned on both side.
Really, it is the high heat and the heated pan that enables the potatoes to brown nicely. The oil and then cooking spray ensures that they don't stick. I don't measure anything and neither does Phin. So, use your judgment and also tinker with time and temperature so that the recipe works for your oven. Happy French Fry Friday!

Wednesday, September 23, 2009

Cloudy (London) with a side of Chili!

Since Clio is off to the land of pies, chips, bangers and mash, it was left to me to complete her Latest Test Kitchen homework. Chili, that thoroughly Americanized mix of meat, w or w/o beans, peppers and spices. Without starting a civil war amongst Texans, Cincinnatians, tailgaters and most importantly Hormel ( I know y'all have a longing for that spicy can of mystery meat!), the homework entailed an updated and zippier version of a Chili found in SoCal. So here we go!

Basics: Can you make out all the ingredients? Pssst. That's a couple of chipotles in adobe sauce located in the zippy bag.


Brown the meat (mix of 2lbs. Blade pork chops and a lb of ole reliable GB, take out and then brown the veg and spices (2 parts (Tbls) chili power/1 part (Tbls) cumin), salt and pepper.


Pictures: Brown this, add that + spices = Above!

When you smell the spices, throw in the red stuff (your favorite brand in a 1 big can of crushed + 2 little cans of sauce) and then toss the meat back into the pool!


Simmer for an hour or so, until you can easily tear the pork away from the bone.Take out chop/shred and back into the pool for a quick half hour dip and voila -its time to eat


Picture: We used 2 cans of beans, but use as much or as little as you like (too lazy this time to make my own batch of beans!)

We garnished with cheddar cheese and toast points (aren't we chi-chi!), slopped it into a bowl, grabbed a couple of spoons and turned on MNF- and if you're really hungry (me), loosen up the belt!


The addition of chipotle and some of the adobe sauce lent some nice heat and a little extra depth to this version of chili. Not a bad batch, certainly a starting point that you can use to concoct your own home brewed version (for vegaholics a blend of tempeh and extra firm tofu might work well). Active time = 20 minutes, Waiting time, smelling something tasty = 1.5 hours. Moral of the story = Start at 10:30/11:00 on Sunday and you'll be ready to watch football with a bowl of red hot and chips at 1!

Happy eating and if you're in the Northeast, go pick some apples and make some pie (yummmmmie!), save some for bobbing for apples and maybe grab a pumpkin for carving-Halloween just around the corner!

P.S. Now since it was a Test Kitchen "secret" recipe, I am obligated to not give out the actual recipe until it comes out in print. Not sure when it will appear, but if you would like to subscribe-here is the link http://www.cookscountry.com/

Wednesday, July 1, 2009

Peas and Thank You


Peas in a pod

One of my favorite spring dishes is risotto with fresh peas and tiny sweet pink Maine shrimp. They both have short seasons. This year, the shrimp came and went, but there was no sign of peas. I waited and waited. No peas. Then the local farmers marked opened for the summer on Thursday, and I was finally able to get my peas. Even though the tiny sweet shrimp are gone, Phineas suggested that I use the peas for risotto, with normal shrimp and scallops for this week's blue plate. Here goes:

So, first I seared the seafood in a mix of butter and canola oil and removed from the pan.

Next, I sauteed shallot and arborio rice in the same pan and deglazed with white wine. I was surprised at how dark the liquids became from the fond and browned butter.

Then, I stirred in a mix of shrimp stock and water, in small doses. Finally, when the rice was nearly done, in went the peas, followed by butter and Parmesan.

The finishing touch (after testing for salt and pepper) was some small bits of seafood stirred in, a flurry of parsley and some of the prettier shrimp and scallops on top. Voila!

I have to confess, this meal was almost a disaster. Most weeks, I have been giving myself a very light gym day or a day off so that I can be home to cook the blue plate. However, last night, since I have done countless risottos, I didn't think about giving myself extra time to cook. So, Phineas and I went for a run. By the time I was home, showered and in the kitchen it was 8:30, and by 9:10 I was exhausted and ravenous. If Phineas had not stepped in for the last few minutes of stirring, I'm not sure what would have happened to my lovely risotto. So, thanks, Phin. I couldn't do it (the cooking, the running, the sewing and everything else) without you.