Showing posts with label Leather Jacket. Show all posts

Wednesday, November 7, 2012

Leather Jacket Details & Review!

Now that I've done my victory dance, here is what I hope is a more thoughtful and slightly less giddy post about the end results and process. 

So, this epic leather jacket process started with a crush I had on BurdaStyle 07/2010 - #118/119 which was designed to be sewn in leather. I made the version with the peplum and zipper (118) but used the one piece lapels from the other version (119) rather than piecing them.


The thing that I was most worried about with this jacket was sewing on leather, a new experience for me.  Are there a few things that I would do differently? Yes, there are. But they mostly have to do with Burda's so-so instructions, rather than anything to do with the leather or sewing it. Here are a few of my keys to success for leather:
  • There are some great resources in print like Sewing on Leather and Suede by Sandy Scrivano (reviewed here), and several other bloggers have chronicled their experiences sewing leather (Lindsay T, Gorgeous Ann, the Sewing Lawyer and Kbenco) in great detail.
  • Muslin. This is not the project to be fitting as you go.
  • Buy quality if you want quality results. I spent an inordinate amount of time on this jacket and I plan to own it for years. I bought beautiful leather (at Mood) that was not inexpensive but is of a quality that I think will last. Every time I pull the jacket on, it feels soft and luxurious.
  • Test, test, test. Test your sewing machine(s) and presser feet, test the products you want to use (glue, tape, etc), test seam finishes and top stitching. Test it all. That way, when it comes to actually sewing, you won't be figuring things out as you go. You will know the tools and techniques you want to use.
  • Use the right tools. For me this included buying a rotary cutter and mat (a great investment, IMHO), binder clips rather than pins (Wonder Clips if you can find them), and proper pressing tools (seam boards/rolls, a pressing cloth, etc) if you choose to do as I did and press your seams.
  • Turn of cloth - just as true in leather as other fabrics. This was a surprise to me.
  • Leather is not difficult to sew, but you want to be thoughtful and alert. Don't rush. Do-overs mean holes in your leather. (I may have taken this non-rushing thing a bit too far).
  • As for Burda's instructions, my advice would be to look outside of Burda's sparse offerings. I like Tailoring: The Classic Guide to Sewing the Perfect Jacket.
  • Since I was making a jacket, I used all of the tailoring techniques that I would use on a non-leather jacket, like using fusible interfacings, hair canvas and adding a back stay. Since I had tested the fusibles and tested ironing the leather, I knew this would be ok. 


Case in point : I think the peplum looks this good because I tested all the elements that went into it - seaming, top stitching, pressing the pleats and I went a better way with the lining instructions.
 
Anyway, here's a few thoughts on some of the little changes I made along the way - good decisions when it came to the details and an inside view for those of you who like to peek inside others' sewing. Plus, you know how I love talking hardware.


Chain for hanging


I added a chain hanging loop.  This was one of the last things I did before sewing the facings in. It's made of about 3-4 inches of chain, two jump rings and some grosgrain ribbon. I sandwiched it between the facing and shell before sewing the seam. There had been a really nice tutorial on a blog called Sophia Sews, but sadly that blog has disappeared.


Piping


I also added lime green piping between the lining and facings. Honestly, this is such an easy addition, but it really makes the finish look professional IMHO.


Shiny!

I also love the Lampo zippers that I had cut to the custom length that I needed at Botani. Could I have gone with less expensive zippers and altered the length myself? Yes and yes, but when you aren't skimping on the leather or lining, do you really want to cut a corner on the one moving part of the jacket especially given that it is a strong design element as well as functional? For me the answer is no. Plus, these are the shiniest, prettiest zippers I've ever seen.

Penultimately, the Pattern Review is here. And all the posts about this epic jacket project with details about fitting, posts about leather, more about pattern changes, etc. can be found here or under the heading Leather Jacket on the side bar.


Finally, a big thank you to all of you who shared tips, opinions and encouragement along the way.  I'm so glad you stuck with me for this adventure! I really felt like I had a team of supporters in my corner.

And that's all she wrote!

Monday, November 5, 2012

Jacket Reveal Happy Dance!
Ladies and Gentlemen, because I feel the need to get back to normal life even though I'm still basically stuck at home, I humbly present my leather jacket, photographed pre-hurricane.


I've been wearing it non-stop in the last week.


 Look! I even made an actual effort to take photographs in interesting locations...


And with me actually posing. That said, there's been a bit of noise in the blogosphere lately about whether you actually look like the photos on your blog or whether you wear your clothing styled the same way in real life. I do. With this jacket, even the inauthentic purple hair is authentically how I've already worn it. And all of these places are actually on my way to the train station in town for my daily commute.

Peplum, yay!

I'm really tickled with how the jacket came out. I originally debated whether or not to make the peplum version. I'm glad that so many of you championed it because, in the end, I think it really makes the jacket.


I have to admit that the fit is a little more glove-like than intended. I probably should have left a little extra room to account for the thickness of the leather + interfacings + lining.  Also, I'm still bouncing back from two rounds of steroids for my back plus the related lay off from running; I'm a little extra voluptuous at this point in time. But all-in-all, I think this is exactly the sort of jacket that looks great with a glove-like fit. 


I will definitely be sewing on leather again soon. Honestly, after this project, sewing any other leather projects will be a piece of cake!


Later this week I will post a few final thoughts on construction and sewing on leather, because I think this party needs to last just a bit longer.


Monday, October 22, 2012

Leather Jacket Lining: Facings and Bagging and Sneak Peek


This weekend, I tackled the leather parts of  lining my jacket. Here's a preview shot.


Look! A jacket!


Burda instructs you to attach the facing pieces to the lining pieces during the construction process. Back at the outset of this project, I foolishly listened. Then when it comes to lining, you bag the lining/facings as one piece (this) into the shell (this). Not that there is anything necessarily wrong with this method, but it makes grading and turning the edges where leather facings are sewn to leather shell more cumbersome and challenging, IMHO.

It would have been easier to work with the facings on their own, finishing all the edges around the collar and zipper. Then I could have dropped in the lining with the facings and jacket edges neatly turned and finished. Live and learn, I suppose.

Anyway, to start getting over this challenge, what I did was machine sew the front edges of the jacket to the facing pieces, stopping at the facing/lining seam line. Then, I obsessively trimmed the seam allowances and turned the facings/lining to the inside, pressing carefully while making sure that the seams rolled slightly to the inside. This was challenging.

There was a lot of bulk at the shoulder seams and along the lapels. The jacket  is topstitched underneath the lapels so the stitches are not visible from the outside, a necessary step. The back collar is also topstitched. I actually had a lot of trouble top stitching these bulky areas and (shame!) had to rip out and re-do the collar stitching when I got a bobbin nest there.

To prep the rest of the jacket for lining, I turned up and pressed the hems of  the rest of the shell and put a strip of 1/4" leather tape close to the turn. This way, my hems are set, but with lots of allowance to work with. So, now I can move forward with hand stitching the lining to my hems.

Hem - turned and taped.

I did this to the sleeves too. 


Here are a few tips that I've picked up from various places that came in handy:
  • Leather is bulky, but it doesn't ravel. Grade your seam allowances carefully and trim the ends at places where there will be bulk (Sunni did a good  post on this).
  • When you grade, the side that you want the seam/seam allowance to roll toward is the one you should trim (ie: the fabric/seam will roll to the shorter seam allowance). So, in general you will usually be trimming the lining or facing seam allowance so the seam rolls to the inside. I intuitively knew this, but only recently saw it confirmed by someone else - new-to me-blogger Madalynne.   

Graded seams. Sorry for the dark splotch caused by my hand I think.

I didn't really talk about sewing on the silk lining fabric, but I know lots of sewists worry about sewing silk or others fine or slithery fabrics. So, here is what works for me:
  • I prefer a microtex needle for the job. It has a very sharp, fine point that does well on sheers and thin, slippery fabric.
  • Back stitching or using your machine's "fix" or "stop" functions at the beginning or end of a seam can pull a fine fabric into the throat plate. Instead of backstitching, sew to the end of the seam, leaving the needle down and raising the presser foot. Turn the fabric 180 degrees, lower the presser foot and stitch in the direction you came from. The result is the same as back stitching, but there's no pulling into the throat plate. I have absolutely no idea why this works.

Just turn and stitch in the opposite direction

Alright, enough for now. The jacket is just some hand stitching away from being finished. I'm planning to hand sew in the evenings this week so that I can wear this jacket to a birthday/Halloween do with some friends on Saturday. Stay tuned!

Friday, October 12, 2012

Leather Jacket Lining: Peplum and Prepping

We're coming down the home stretch with my leather jacket!  I've decided to tackle lining the jacket in a few posts, both for clarity and because I've divided the process into a few distinct parts in my head. (Oh, and also because I'm not done yet.)

BurdaStyle's instructions for lining the leather jacket are not terrible for Burda, but nothing special either.  And there are a few problems, like the lining is left hanging free in the back. Free hanging lining is fine for trousers or skirts or a long coat with a deep hem, perhaps. But I can't really see how a free hanging lining would sit well at the curved pleated peplum on this jacket.

Really, Burda? How's that supposed to work?


Thankfully the two helpful reviews of this pattern on PR addressed the peplum and lining it. The peplum piece is very curved, which makes a deep hem - in leather - a bit unrealistic. So, at the start of this project I decided that the best solution would be to use the lining as a hem facing before doing anything else to the peplum.

I stitched leather and lining together at the hem (ws facing), trimmed the seam, flipped the lining to the inside, and then pressed to create a narrow seam.

Narrow hem using my lining as a facing
 
I basted the lining to the side seam allowances of the peplum and from that point on, treated it (leather and lining) as one, pressing in the pleats and sewing it to the other back pieces.This was done - but not blogged - quite some time ago. So, when it comes to lining, I'm going to have some hand stitching to do around the peplum. Also, this gives me an enormous hole to turn the lining thru - an unintended benefit!

Peplum sewn into the unlined jacket, raw lining edges showing

As I get ready to line, I also tidied up and prepped the insides of the leather. I found that the sleeve seam allowances kept flipping back into the sleeves rather than facing the body of the jacket.  Therefore, I ended up catch stitching them down to the back stay on the back side and to the hair canvas on the front, being careful not to stitch through the leather shell. I also tacked in shoulder pads.


SA catch stitched to hair canvas


The next step is basically a bagged lining, but there are some definite challenges because I made the mistake of following a few of Burda's instructions (oops!). Anyway, more to come.

Tuesday, October 2, 2012

Oh, Look! Sleeves.


Look! Look! The sleeves are in! And they are both set in as perfectly as I've ever set in a sleeve!  No accidental pleats or unintentional gathers. Woot!

Since a few people mentioned that they had never heard of leather tape before, I thought I'd provide a bit more info.  I bought on line at Wawak (click here). It comes in a 60 yard roll in two different widths - 1/2" and 1/4". Here's the description from the website:
High performance high tack double sided seam tape for leather and vinyl hemming. Allows for superior bonding and conformability to irregular as well as flat surfaces such as plastics, metal profile extrusions, decorative trim, and is also used as a universal all purpose double coated tape.
That's it. It's just really sticky double sided tape that you can use to glue down seam allowances. Peel from the roll, stick the sticky side down, peel off the backing on the other side and smoosh down the seam.


Next step: shell + lining = finished jacket.

Monday, October 1, 2012

Q: How Do You Set In A Leather Sleeve?

A: Very, very carefully.

One sleeve "pinned" in, one sleeve ready to go.


Leather jacket production is finally back in full swing. Yay.  I spent a chunk of time yesterday reviewing where the project stood, what the next steps are and tidying up a few loose ends.

There were a few seams that needed top stitching before I went any further. Plus, those that were not going to get top stitched - like the sleeves - needed to be finished with leather tape.


Leather tape is essentially very very sticky double sided tape that you use to glue down the seams.  I know that other sewists have reported good results using glue applied with a q-tip. But, since I was the kind of kid whose art projects generally left debris, I decided that the tape was a better option for me. It was easy to use and carried less risk of gluing myself to the project or the project to itself or my fingers together. That said, my early experiments with leather tape taught me NOT to tape and then top stitch the same seam. Do one or the other, but not both. The tape adhesive will seriously gunk up your needle.

After that it was on to setting in the sleeves. And let me tell you, leather does not "ease" so well. It took several tries, tons of binder clips and lots of finagling to get the sleeve in in a way that I think - once sewn - will not cause any pleats or folds and will hang smoothly from the shoulder.

Ridonculous number of binder clips.

Honestly, there really isn't a good way to do a do-over with the sleeves. I'm hopeful that the care I took will lead to near perfect results on the first try. I plan on sewing this one and then moving on to the second sleeve tonight. (Fingers crossed.)

There really won't be much left to do after that: just putting in the lining and some finishing touches. I'm glad to be coming down the home stretch on this project just in time to be wearing it. 

Monday, July 30, 2012

Survey: How Do You Deal with Distraction?

I'm relieved that it seems like a pretty slow summer in the Northern blogosphere. I'd be eating my heart out if everyone was churning out gorgeous summer frocks like nobody's business while I'm plodding along.

So, what I'm interested in knowing today is: How do you deal with external distractions when it comes to your sewing or other hobbies?  When your mind is cluttered with other concerns is sewing an escape? Or do the other things going on in your life bog you down with your projects?

In addition to dealing with pain, which is draining, I have a few larger issues on my mind these days. I may have a number of career and personal opportunities in the near future, which is wonderful, but it's making my mental space a crowded landscape. There may be some difficult decisions ahead. And all of this is distracting me from sewing. Instead of my usual focus, I find my mind wandering between any number of vague fantasy projects while my jacket remains unfinished. It's very unlike me.

I did cut the sleeves last weekend, and this weekend I sewed in the zippers. 


 But without focus, I'm much more mistake-prone. Not a good thing now that I'm on the home stretch. And I did, in fact, make two mistakes. First, I just simply forgot to interface the sleeves where the zippers went in. Naturally, I realized this after finishing the second one. Also, I sewed one up slightly incorrectly and had to take out some stitches and it left a mark. It isn't too bad, but I know it's there. 


Both of these were mistakes born from distraction. Usually, when I'm not thinking about work or family or friends, you can bet that my mind is at work visualizing and planning my next sewing steps. But with so much other clutter, this just isn't happening. I forced myself to sew the zippers because I'm irritated at not having this done. But without good planning, I made mistakes.

So, I've decided I'm going to move forward in little or big bursts whenever I feel up to it mentally and physically, but not force myself again. Sigh. This is frustrating indeed!  

In the interim, because I feel like sewing in general, I've got some less mentally taxing sewing projects going on too. More later this week. Happy sewing or whatever it is you are busy with!


Thursday, July 19, 2012

The Sleeved and The Sleeveless

So I haven' been totally idle while traveling. I made a lot of progress on my sweater.  Here is the whole front half of it:


Not so bad for being carted around rainy Europe in a ziplock bag for 12 days.


The back, which is essentially the same as the front, is about 1/3 of the way done and coming along pretty quickly. And since there are no sleeves, this sweater is about half done at this point.

I've also started to face my fear of sleeves. My jacket lining now has 'em, and it's time to cut the jacket sleeves in leather. I'm feeling some anxiety about this. For some reason, even though my muslin process was pretty painstaking, I still feel like there is some sleeve disaster waiting to happen. Silly, I know, but I don't wear a whole lot of sleeves and therefore don't sew them often. Anyway, it's time to take a deep breath and cut.


Anyway, I'm trying to catch up on all your blogs. It seems like everyone has been busy and productive! Happy sewing!

Monday, June 25, 2012

Tailoring Leather: Back Stay and Turn of Cloth

Staying focused on my leather jacket has become challenging now that summer has arrived. But I did get two important tasks done this weekend.

First, I created a back stay.  The back stay stabilizes the shoulder area and collar, keeping it from stretching out or distorting. It also supports the garment fabric and creates a more smooth line across the shoulder blades. My leather does have some give, so I figured that it should have a back stay to support it.

I made a pattern by tracing the back of the jacket onto tracing paper.


And then cutting it out of a firm muslin, using pinking sheers for the bottom edge.


Here it is basted into the jacket back. 


The other - and more difficult - task was dealing with the lapels. I wasn't happy with how they were lying on the jacket - once I tried attaching the shoulder seams they refused to lay flat - there was too much fabric on the underside of the lapel and it wasn't curving appealingly over the jacket bodice and around the neckline. I hadn't considered that turn of cloth would play a role with leather, but it appears that it does. Thankfully I had only basted the lapels to the bodice in the seam allowance and not on the seam line. So, there should not be any visible holes in the finished jacket.

To fix  the problem, I "pinned" (with binder clips) the lapels to the jacket front pieces while I was gently rolling the seams in the direction they will ultimately go and tugging the under collar so it peeked out a bit more at the seam allowance (since the undercollar needs to be a smidge smaller than the upper collar.) Then I trimmed the under collar. It made lining up and stitching the shoulders much easier. Now I think the lapels will look good once the jacket is finished and all the seam allowances are going in the directions they need to go.

Here's the jacket, with shoulder and side seams stitched, but minus the sleeves.


Lapels, back stay... all behaving


And in case you are curious to see the insides of the jacket front with my hair canvas interfacing, well, here you go. 


There seems to be plenty of guidance when it comes to actually sewing on leather, but less when it comes to tailoring a leather jacket. Consequently, I'm moving at a snail's pace and thinking through every step of this project as I go. It's mentally tiring sewing, if you know what I mean. And I'm having a hard time staying at it for hours at a time. I seem to do better tackling one small task at a time. The worst thing for my jacket would be if impatience lead to a mistake. So I'm keeping at it, but moving slowly and taking breaks.

To keep my sewing mojo up, I've decided to work on some shorter, easier projects while I finish up the jacket - nothing that requires much thought. Anyway, stay tuned because I'll hopefully have a new finished project in the next week.

Monday, June 18, 2012

(Starting to Look Like a) Leather Jacket: Zip it!

Look at my jacket! It's actually starting to look like a jacket.


Or at least several large pieces of jacket...
 
Front

Back

 And unlike the muslin, this time I put the zipper in correctly on the first attempt. (Phew.)


I bought this zipper at Botani Buttons, which has recently expanded their store significantly.  They now have a whole room full of zippers that they will trim to a custom length for you while you wait. I was happy to take advantage of this service since I needed a non-standard length separating zipper and potentially could have run into disaster if I tried to do it myself (read: ineptitude with pliers). I was told that the Lampo zipper that I bought is what the house of Chanel uses. So, I'm now thinking of this jacket as the closest I will ever get to owning a Chanel jacket. LOL. Anyway, those of you in the NY area should check out this new section the next time you are looking for a zipper for a special garment (read: not cheap). But look how lovely.

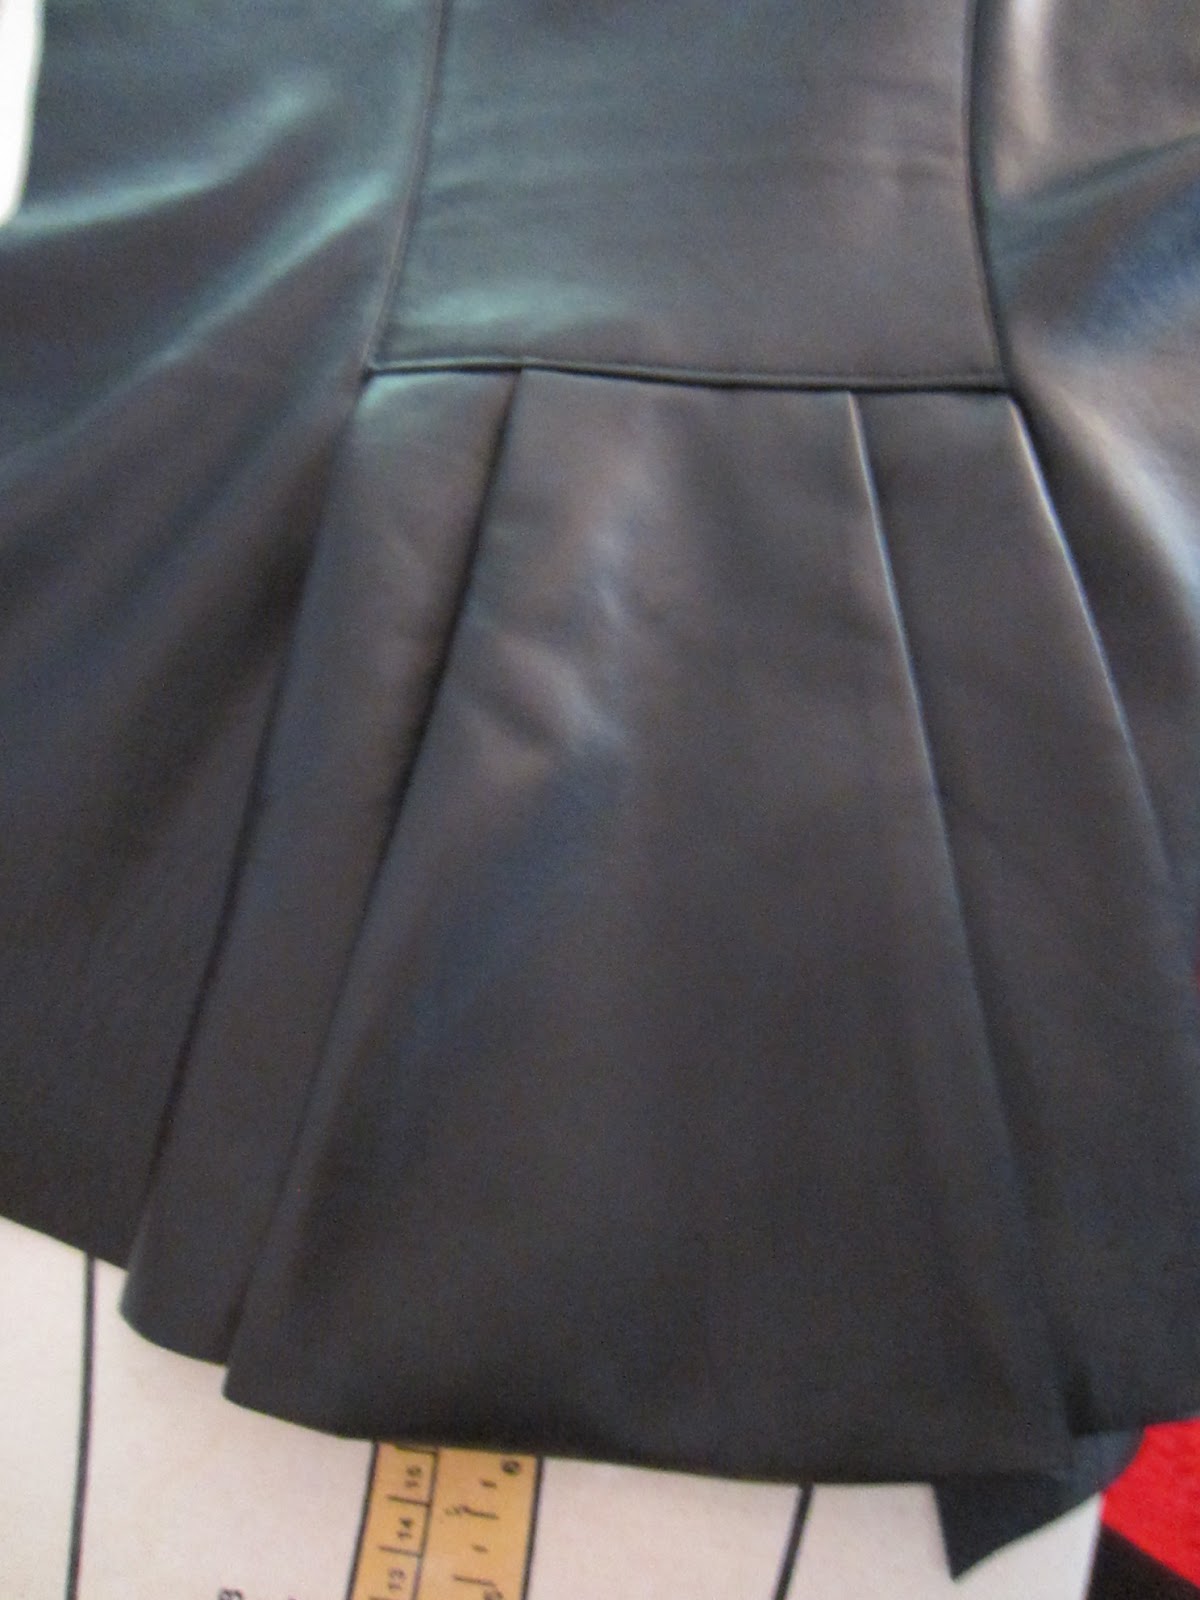
Also, check out the peplum:


Seriously, there is something to be said for ironing leather. How else would I get the great pleats?

Pleated peplum with topstitching = awesomesauce
 Next, I have to make a pattern for the back stay. That's the only reason that I didn't get to sewing the front and back together.  Stay tuned.

Friday, June 15, 2012

Sewing On Leather: Stitching and Seams

Now that I've confessed to fusing all kinds of fusibles to my leather with an iron, it's time to talk about how I'm sewing things together.

There's been a bit of chatter in the blogosphere recently about how useful (or not) tutorials are when written by novices or those who don't know good technique. I've never written a tutorial, but I do like to blog about  the techniques that worked for me as a part of my sewing journey. So, I feel the need to add this disclaimer: this is what is working for me on my very first leather project and with the tools and leather that I am using. I am not an authority; I'm a learner. And I welcome any and all comments and suggestions on better techniques. OK, on to the fun...

Stitching on Leather test scrap

Basics
As far as stitching goes, a slightly longer stitch length coupled with a leather needle seems to be the usual best practice. Do not backstitch (why make more holes?) and instead just tie off your thread ends. So all of that is what I did, too.

If you look at the test scrap below, you can see what happens when you pull out a row of stitches - it leaves a very visible line of holes! This test was enough proof to convince me to take things slowly!

The line of holes is the second line from the right (photo center).

Also, since you don't want to pin your leather, use small binder clips. I got some fun hot pink and lime green ones at Staples for $1.99 for 20, which beats the pants off of Wonder Clips, which seem to be pretty expensive on-line and I can't seem to find anywhere in the Garment District.


The Actual Sewing
Sewing Machine: Fancy Modern Viking vs. Granny's Kenmore
So, I was contemplating which machine to use for sewing this jacket - my computerized Viking Sapphire or my vintage Kenmore that was inherited from my Grandmother.

After MUCH testing on scraps and looking at the stitches and seams, I've decided on a compromise: I'll do most of the sewing on my Viking because of how easy it is to use and adjust as I go. Honestly, this is the machine I'm most comfortable using and it has a leather setting which worked beautifully. 

However, since the very best looking stitches that I made were on my Granny's old Kenmore, any stitches that will show - topstitching, etc., will be done on Granny. Also, since the old Kenmore sews slowly as a rule, one of the benefits is that it will slow me down and hopefully keep me from messing up the areas where the stitches will show.

Presser Feet: Teflon vs Rolling Foot

I really wanted the rolling foot to win, but the teflon foot won by a nose.

I've seen recommendations for both of these feet, and in my tests, there really wasn't a huge difference, but to my eye and hand, it just seemed like the teflon foot fed the two layers of leather more smoothly and evenly.

I also tested using my narrow zipper foot and that actually worked out pretty well, too. So I'm not really sure how big a difference any of these feet really make in the end. I plan to use the zipper foot for the zippers since I'll be sewing on the zipper tape and not the leather.

Opening the Seams
Again, I tested every method I could think of or had seen recommended for opening the seam allowances and "pressing" the seams open.

Finger pressing: This was fine to get things started, but not particularly effective. The seam stood up like a spine.

Finger pressing was ineffective
  

Rubber mallet:

Bashing with a mallet
Next I tried using a rubber mallet with the seam spread open over a piece of molding that I pilfered from my father-in-law (the mallet is his too). It was somewhat effective, although the seams didn't lay precisely flat even after much bashing.


Iron: I hope at this point you aren't surprised that I took a hot iron to my leather. And, quite frankly, the iron - used with a silk organza press cloth and my piece of molding - was easily the most effective method of  opening the seams. Honestly, they behaved perfectly and there seems to be no adverse effects whatsoever. 

Good old iron and pressing cloth


Glue and Tape:
 
Glue, binder clips and leather tape in 1/4" and 1/2" width.
To finish the seams, I tested gluing them down, topstitching and using leather tape in 2 different widths. The glue was very messy (read: making a mess is part of my baking process. But what works in the kitchen is not appropriate for the Craft Lounge.)

I thought I'd found a good solution when I tested the leather tape. It basically is double sided, super sticky, clear tape. It really held down the seams, but when I tried to topstitch, the only thing I accomplished was totally gunking up the needle to a point where it got stuck in the leather. Not good.

Leather tape in action.
Quite frankly, I don't think glue or tape is necessary. If there are any unruly seams that aren't going to be topstitched, then I would use the tape. But overall, I don't think I really need to do either of these things.

In the end, the verdict is that some seams will be top stitched and some will just be pressed open. And I'll see how it goes.

So, there you have it! And here you have the back of the jacket - stitched with my Viking and pressed open with my iron. Oh, and by the way, I had no trouble with the back shoulder princess seams. I've heard that leather doesn't ease well, but these seams eased together nicely.


My jacket is in a bunch of pieces at the moment, but I hope will be looking more jacket-like by Monday. Have a great weekend and stay tuned!