Wednesday, January 30, 2013

I'm Not So Good at Letting Go: 2 Mini Reveals

Sometimes I just can't let go and I find myself going back to "edit" garments that I had once considered finished. Do you do this too?

I don't mean that I re-do something immediately after the first try on, but that weeks later I go back and improve (hopefully) a garment. Last weekend, it was my kimono. Not that there was anything wrong with it, but I decided that it would fit better if it was narrower thru the base of the neck.

So, I undid the seam and crack stitching at the back of the neck, made a pleat and reassembled. I'm much happier with the fit through the shoulders and neck now.


Added pleat


In addition, I couldn't quite let go of the kimono fabrics. The sleep bra fail still nagged at me. However, I know when a fail is a fail; I was unwilling to try to fix the bra. So, with very little fabric left post-bra, I decided on a sleep mask as a luxurious little companion piece for the kimono.


Sleep Mask from In Stitches by Amy Butler


It's not my best make, but I love it! The silk back side feels sooooo soft and lovely on my skin. I plan on taking this little bit of luxury with me on any future red eye flights.


Luxurious companions


So, am I the only one who continues to tinker with a project long after  is "finished" or has a hard time "letting go" of a fabric? Or do you do this sort of thing too?


Next up, I have 2 projects with shiny metallic fabrics! Yay!

Thursday, January 24, 2013

Finished Giraffe!

I finally put the finishing touches on my giraffe!


Look at that sweet face!

Isn't (s)he the sweetest thing?  It's going to be very hard to give this cutie away to Phin and my new niece (due in about 4 weeks!), or resist the urge to give it a gender, name or personality. But I suppose that I should leave all that for it's eventual owner.


I love the pompoms

It really didn't take all that long to knit and wasn't difficult. There were a few parts where I got hung up a bit, like making pompoms. Yeah. I don't know why I found pompoms difficult at first, either.

Here's my humble attempt at a time-lapse sort of photo essay on the construction of this giraffe.


Just a reminder that this pattern is from Susan B Anderson's Itty Bitty Toys book and Craftsy video, both of which I give an "A". This is an adorable baby gift. I knit it with daffodil and flamingo colored Cascade 220 Superwash yarn, which should make it easy to clean. It's stuffed with non-toxic fiberfill and a beanbag of non-toxic poly pellets in the bum to give it some weight and help it sit up.  I sewed the beanbag out of muslin so that none of the pellets can escape and be a choking hazard. The giraffe is quite large - about 14 inches tall sitting down.

Giraffe Love


It was nice to take a break from a demanding lace knitting pattern and just knit in circles, without having to worrying about fitting. The most challenging part was stitching on the face. I didn't get everything perfectly symmetrical, but I like the end result. I think the giraffe looks a bit jaunty with the horns going in slightly different directions.

There will definitely be more knit stuffies in my future!

Wednesday, January 23, 2013

Passing the Cake: Giveaway Winner

So, the winner of the Let Them Eat Cake giveaway - a cleanse at the start of my frosting diet - is:

Jodie K

These lovelies are coming your way, Jodie. Shoot me an email at clio[dot]phineas[at]gmail[dot]com to claim your cake!


Happy sewing, everyone!

Monday, January 21, 2013

Red Vintage Slip Reveal (Phew! Finally!)

This slip took so much more time than it warranted!  So, without further ado:


He he he.

Moments after finishing my slip, I started thinking about blogging the finished project. And I got a little, um, nervous. Posting anything on the internet is like squeezing a tube of toothpaste: once you squeeze, there is just no getting that toothpaste back in the tube. It's out there for good. Like pictures of me. In a slip. Shudder. That said, it's a pretty modest slip. But I may live to regret this. 

Oh, I should apologize for the uneven quality of the photos. I had to shoot indoors for obvious reasons.

I was trying to channel 1943, the year the pattern was made, as if I was getting dressed for my day. Rituals of all kinds, including beauty rituals, can be calming.


  Like doing hair and makeup. 


Deciding what to wear.


  Saying "honey do I look ok?"

 Wow, in 1943 women were much higher maintenance than I am! OK, here are some detail shots.
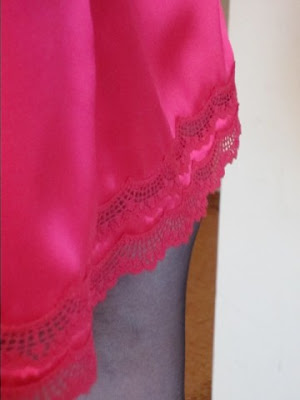
I love how this came out!

 After some waffling, I decided to add a second layer of lace trim to strategically hide the hole.  I simply sewed it with a narrow zigzag stitch at the top and bottom of the lace, and then trimmed away the silk from behind it.
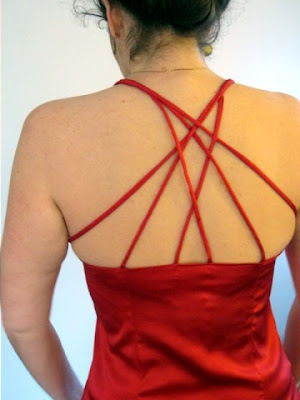
I'm really happy with the back too.

For the straps, I decided to diverge from the pattern's simple, wide and straight straps. I was inspired by this slip that I had pinned. Three spaghetti straps are braided to about the shoulder and then splay out and crisscross across the back. You can see the braided front straps a bit here:


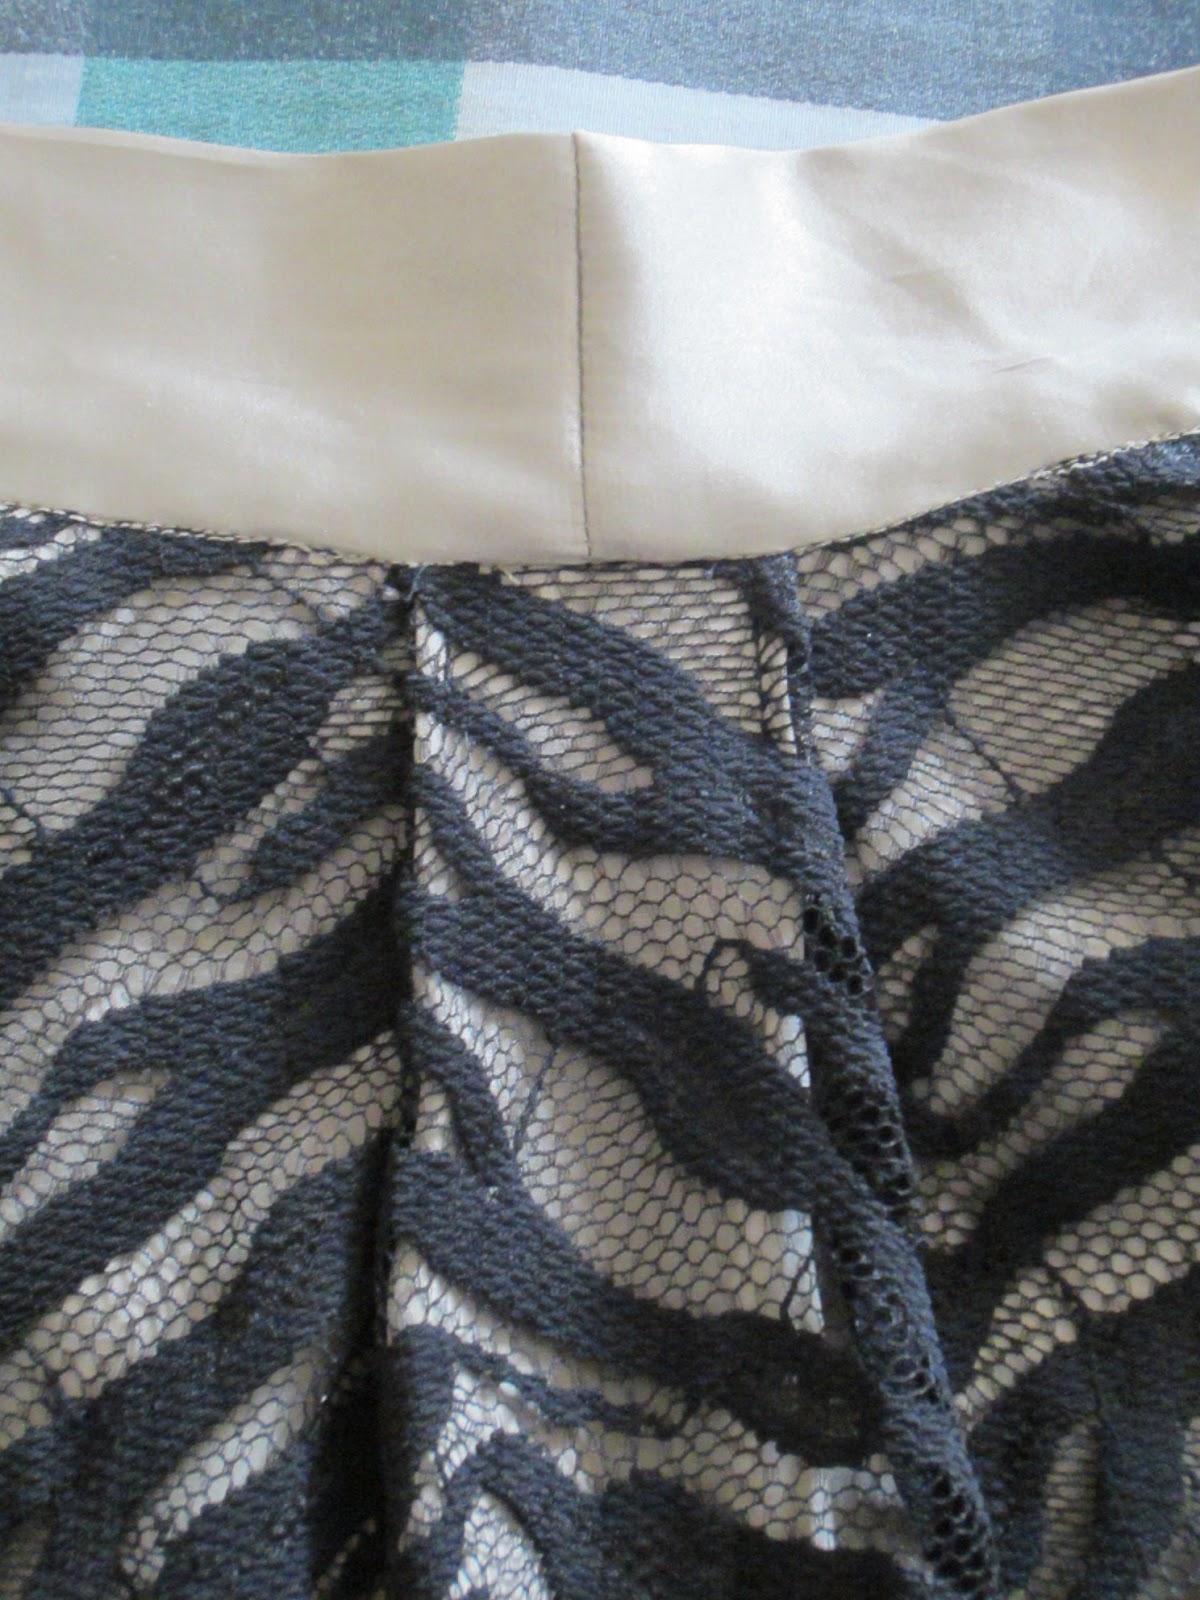
I finished all the seams by pressing them to one side and topstitching with silk thread. I think it worked out well. There is a facing around the neckline/back. I also topstitched the neckline/back to finish it. 


This is my first (only) vintage pattern, and I can see why some sewists really love them. The fit out of the envelope was much better than most of the modern patterns I've used. I think that modern patterns generally have a larger full bust measurement for the same size waist, but not a larger cup size. I usually have to take in a huge amount across the back and at the sides, but then do a little FBA in the front. On this pattern I only needed to take in the sides and back a smidge, and was able to accomplish the FBA by just letting out/shaping the princess seams over the bust with the seam allowance. So, three cheers for vintage!

Anyway, my slip is now tucked away with all my other pretties.


Frosting Diet: In frosting terms, I'd say this is like the cream cheese frosting that you'd spread on a red velvet cupcake. A silk slip is definitely frosting in my book! Silk feels so luxurious on and the layered lace hem and crisscross straps really add to the glamor of this slip. Plus, it's red instead of beige or black. As I was sewing, I kept thinking of the red petticoat that Rhett Butler gives Mammy in Gone With the Wind. I'll definitely feel special wearing this, like it's my supersuit under my clothes.

I'm glad this is done and thrilled to be wearing it. Unlike me, I hope you are all enjoying MLK Day at home! Next up is the Cake Giveaway winner.
Thursday, January 17, 2013

Solutions for the Slip Snip

Or is that Snip Slip? You decide.

Thank you all for the comments on my last post! Not that I want anyone to have a sewing disaster, but it is somewhat encouraging to know that we've all been there. So, I thought it might be helpful to share some of the good ideas you all mentioned for fixing my little errant snip.

Luckily for me, the hole is 1 - tiny; 2- very near the hem; and 3 - right at one of the front princess seams. So, there are a number of ways I can strategically fix it.

Here's what I've got in the stash:

Red Lace Trim

Re-hemming shorter or adding a wider trim
Either is a pretty easy fix. I have enough of all but the top lace shown above to simply re-hem the slip above the snip.  Some of these trims are wider than the one I initially used (2nd from top), so I would be able to preserve the length of the slip.

Phin actually came up with the suggestion that I add a second row of the same lace on top of the snip so that the hem would have two tiers, sort of like this:

Vintage slip

I could use tulle, mesh or just some of the slip itself between the two rows of lace.

Adding a slit
Since the snip is right at one of the front princess seams, I could easily add a slit by opening the seam several inches and using the same lace trim that I hemmed with to edge the slit. Like this:

La Perla silk and lace slip


Adding an applique
There are two ways I could use an applique to cover the hole. The first is that I could just sew or iron on a simple applique to create a cute little motif and act as a patch for hole. I could use the flower trim in my stash (top in the above photo) or store bought hearts:

Wrights appliques

I would want to avoid anything that was embellished with beads or sequins - they would be liable to catch on the inside of whatever dress I wore over the slip. 

The other applique option is to buy some lace and cut out some of the motifs to create custom appliques, as detailed in this fantastic article in Threads. The idea is that the fabric underneath the applique would then be cut away, like this:

Threads - Create Couture Lingerie


Similarly, one suggestion was to do add a triangular lace insert over that spot. I had a hard time finding a picture illustrating this, but think it would be a bit like the lace treatment at the waist of these knickers, but in just one place - the offending place - at the hem.

Between the Sheets Lingerie


It would sort of give the impression of a slit, without there actually being one.

Contrast fabric/Color blocking
Inspired by the triangle idea, it occurred to me that a triangle of contrasting fabric could be color blocked into the skirt portion. I would probably use hot pink silk and then change the strap color also. I can't seem to find any picture illustrating this. 

Patching or Darning
I think in this case that patching or darning, unless camouflaged somehow, is just not feasible. On a busy pattern, this could be near-invisible. However on shiny stretch silk, this would be a disaster.

OK, so that is the menu of choices at this point. I kinda wish I could try them all. Stay tuned for what I decide and thanks, again, for all the sympathy and suggestions! 

Tuesday, January 15, 2013

One. Errant. Snip.

The Craft Lounge is still being used as a guest bedroom on the weekends (4 weeks and counting, folks). 

Since I mostly sew on the weekends, it's really taking a big bite out of my sewing time. But last night I was determined to finish my vintage slip (aka: red silk vintage frosting). It turned into one of those reminders of why I don't sew at night. Or on Mondays.

One errant snip. (And a slip teaser)

Naturally, this ill fated snip happened mere seconds after congratulating myself on finishing the slip. I don't know where things went wrong; I was innocently snipping a stray thread from the seam allowance.

So, it looks like my knee-length slip will now be a slightly above-the-knee-length slip. D'Oh!!!

Am I the only genius who does things like this? 

Saturday, January 12, 2013

SOS: Save the Thimble!

Ladies and gentlemen, the humble sewing thimble is under attack!


OK, OK, not really. I'm referring to the thimble Monopoly token. Hasbro has decided that it's time to modernize Monopoly by giving one of the old tokens the axe and adding a new one. (See here.) It's like when Crayola decided to "pink slip" Raw Umber from the 64 crayon box. Or when M&M  replaced the light brown M&M with blue. Am I being sentimental? I'm usually such a modernist.

Let's save the thimble - it's a symbol of the craft that we all love. Some (non-sewists) might think it is quaint and old fashioned, but those of us who do any hand sewing know better. Facebook and Twitter users can vote for the token that they want to "get out of jail free". The token with the fewest votes will get the ol' heave ho!You can also vote on the new token.

Vote here or at #tokenvote if you tweet.

More Blogger woes: My comment problem seems to be ongoing. So, if you signed up for the Let Them Eat Cake! giveaway but don't see your comment posted, feel free to send me an email - clio[dot] phineas [at] gmail [dot] com - to confirm that you are "in".  (Sarah Mayo, House of Pinheiro, Poppykettle, Kirsty, Amity Originals and Jennifer Churchill - you are all "in" even if your comments can't be seen here for whatever reason). Oh and there is still loads of time to enter!

Have a great weekend everyone!