Several weeks have passed since I was out on the town in my sexy spin on the lady tux. So, it's about time I did a little review and show you how I did an FBA on the top.

As a reminder, the pattern is McCall's 7366, a jumpsuit with bodice and length variations. I sewed version B.

First, let me just say that if you - like me - are a regular BMV sewist and normally go down a few sizes from the envelope measurements because you are used to a lot of ease in their patterns, just stop and heed my warning. This pattern fit according to the envelope. For my first muslin, I used my regular BMV size and had to do a wiggle dance to get it over my hips. There was no way I could have zipped it up. However, a few muslins later and the fit was great!
And that is the thing with view A and B of this pattern. For a trim fitting jumpsuit that has a neckline that plunges almost to the navel, fit is the thing. You don't want the neckline to gape and risk a wardrobe malfunction. I found that the torso length and the right amount of ease in the legs were both important to fit and comfort. If the torso is too long, you will get gaping down the neckline - no bueno! If it is too short, particularly on the back, you won't have enough ease to sit down without the collar pulling and choking you - really no bueno! And the leg ease is important so that when you sit, it isn't binding, but yet has a slim fit. I'm actually surprised that the fabric recommendations did not include stretch woven fabrics for this reason.
Let's talk about the bust fit. Here is my altered pattern piece.
In addition to my normal 2-3 inches of length, I need about 2 extra inches total across the bust these days. On a top like this, which is split down the middle, the temptation might be to skip it. But you really don't want to have the fabric bowing out at the fullest part of your bust or have gaping or pulling there. To avoid any wardrobe malfunctions, you want a enough coverage across the bust and just enough - but not too much - length from neck to navel to keep the neckline pretty snug to your chest. This pattern is drafted with two pleats at the neckline on each side. This made the FBA easier than you might think. I added the extra width I needed down the whole length of the bodice (you can see how I did it in two places which sort of helped me keep the grainline sane) and, instead of adding a dart, simply added a third pleat to eat up the extra fabric at the neck.
I also reshaped the side seam at the waist. To complete the FBA, I needed a bit more length at the center front, to go over the bust. I added a little wedge to lengthen the neckline without lengthening the side seam. This makes the neckline slightly bent. But because my body is curved, the neckline actually appears pretty straight on me, without much in way of bowing. Aren't optical illusions great?

As for the rest, I just played around with the length and width of the pattern until I achieved a fit that worked - there was no magic there, just some trial and error sewing.
I really loved this pattern and my tux. The only two style changes I made are that I decided to eliminate the pockets for a slightly sleeker look and I changed up the cummerbund/belt a bit. Honestly, the belt was the one part of the pattern that I didn't muslin and the one part I was disappointed with. I would do it completely differently next time. It's basically a straight (not curved) inside piece with a bias cut outer piece that is meant to drape into the pleats you see. I am very curvy at the middle and the straight cut just didn't work on me - it kept either riding up or slipping down. You can see that I changed the closure from hook and eyes to two ties so I could better adjust the fit, but even that didn't really help. In the end I tacked the belt to the center front and at the side seams so it would stay in place. Also, the bias draping really didn't work without a lot of adjusting. Perhaps it's my fabric. But to do again I would opt for a more complicated belt with shaping and pleats.

Speaking of fabric, this is a GORGEOUS viscose satin that I picked up at Mood. I didn't want to spend a fortune on silk or be all sweaty in an unbreathing sweaty poly. For $18/yd this was the perfect thing. It looks and feels really luxe, was beautiful to sew and I was cool and comfy even on the dance floor. Oh, and I did in the end choose to make the side stripes out of faux leather rather than sequins.

And that is it with fit and alterations!
This style is not for everyone, but I think it strikes a good balance of being sexy, thanks to the neckline and peek-a-boo back, without being trashy thanks to the fuller, more modest side/armscye coverage. With that much front cleavage, I wouldn't want any kind of side-cleavage or a short hem or a skin tight fit. My personal sense of how to be sexy, but not trashy is to go sexy in just one area at a time (ie: sexy cleavage OR hemline OR body con fit, but not more than one at a time). And this pattern fits the bill. So, good style and drafting decisions, McCalls!

I really hope I have more occasions to wear this tux. I do love a great dress, but this was more comfy and I felt unique and chic and a bit daring in it. And once I worked out the fit, I really did feel secure and not at risk of any wardrobe malfunctions on the dance floor. For a black tie optional wedding, where I really didn't know how formal most guests would be, this was just the thing!

As a reminder, the pattern is McCall's 7366, a jumpsuit with bodice and length variations. I sewed version B.

First, let me just say that if you - like me - are a regular BMV sewist and normally go down a few sizes from the envelope measurements because you are used to a lot of ease in their patterns, just stop and heed my warning. This pattern fit according to the envelope. For my first muslin, I used my regular BMV size and had to do a wiggle dance to get it over my hips. There was no way I could have zipped it up. However, a few muslins later and the fit was great!
 |
| Front View |
 |
| And peek-a-boo back |
Let's talk about the bust fit. Here is my altered pattern piece.
 |
| Alterations |
In addition to my normal 2-3 inches of length, I need about 2 extra inches total across the bust these days. On a top like this, which is split down the middle, the temptation might be to skip it. But you really don't want to have the fabric bowing out at the fullest part of your bust or have gaping or pulling there. To avoid any wardrobe malfunctions, you want a enough coverage across the bust and just enough - but not too much - length from neck to navel to keep the neckline pretty snug to your chest. This pattern is drafted with two pleats at the neckline on each side. This made the FBA easier than you might think. I added the extra width I needed down the whole length of the bodice (you can see how I did it in two places which sort of helped me keep the grainline sane) and, instead of adding a dart, simply added a third pleat to eat up the extra fabric at the neck.
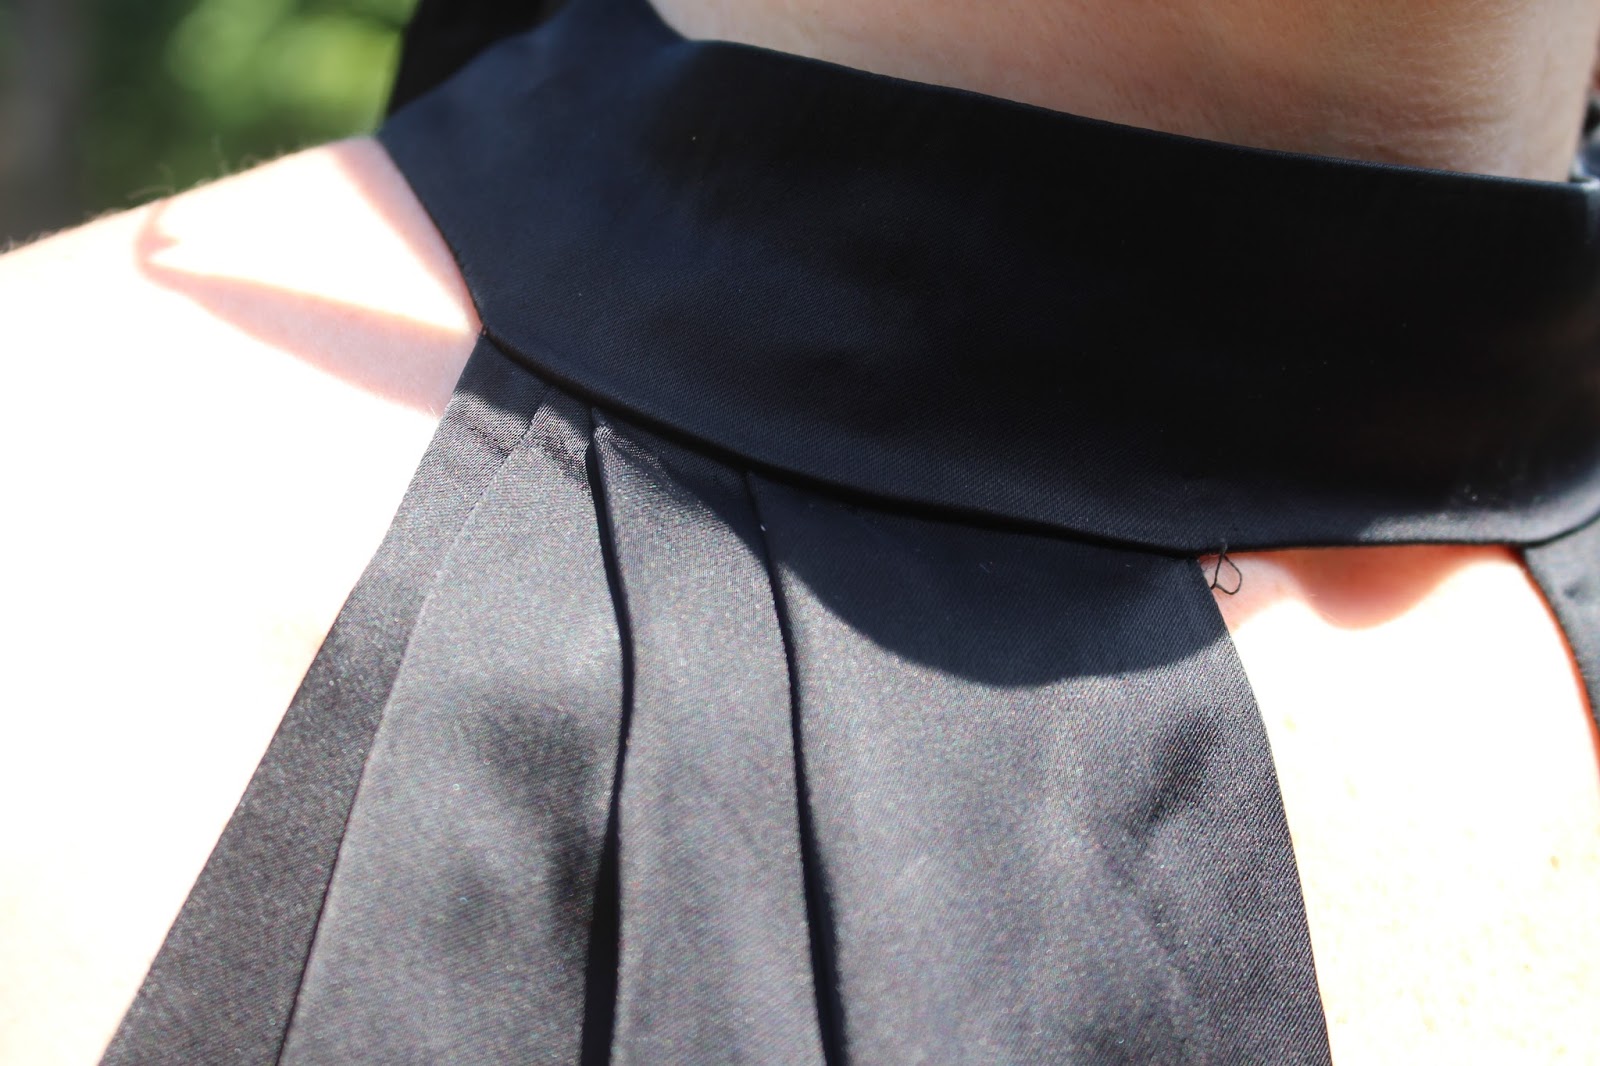 |
| Third Pleat |
I also reshaped the side seam at the waist. To complete the FBA, I needed a bit more length at the center front, to go over the bust. I added a little wedge to lengthen the neckline without lengthening the side seam. This makes the neckline slightly bent. But because my body is curved, the neckline actually appears pretty straight on me, without much in way of bowing. Aren't optical illusions great?
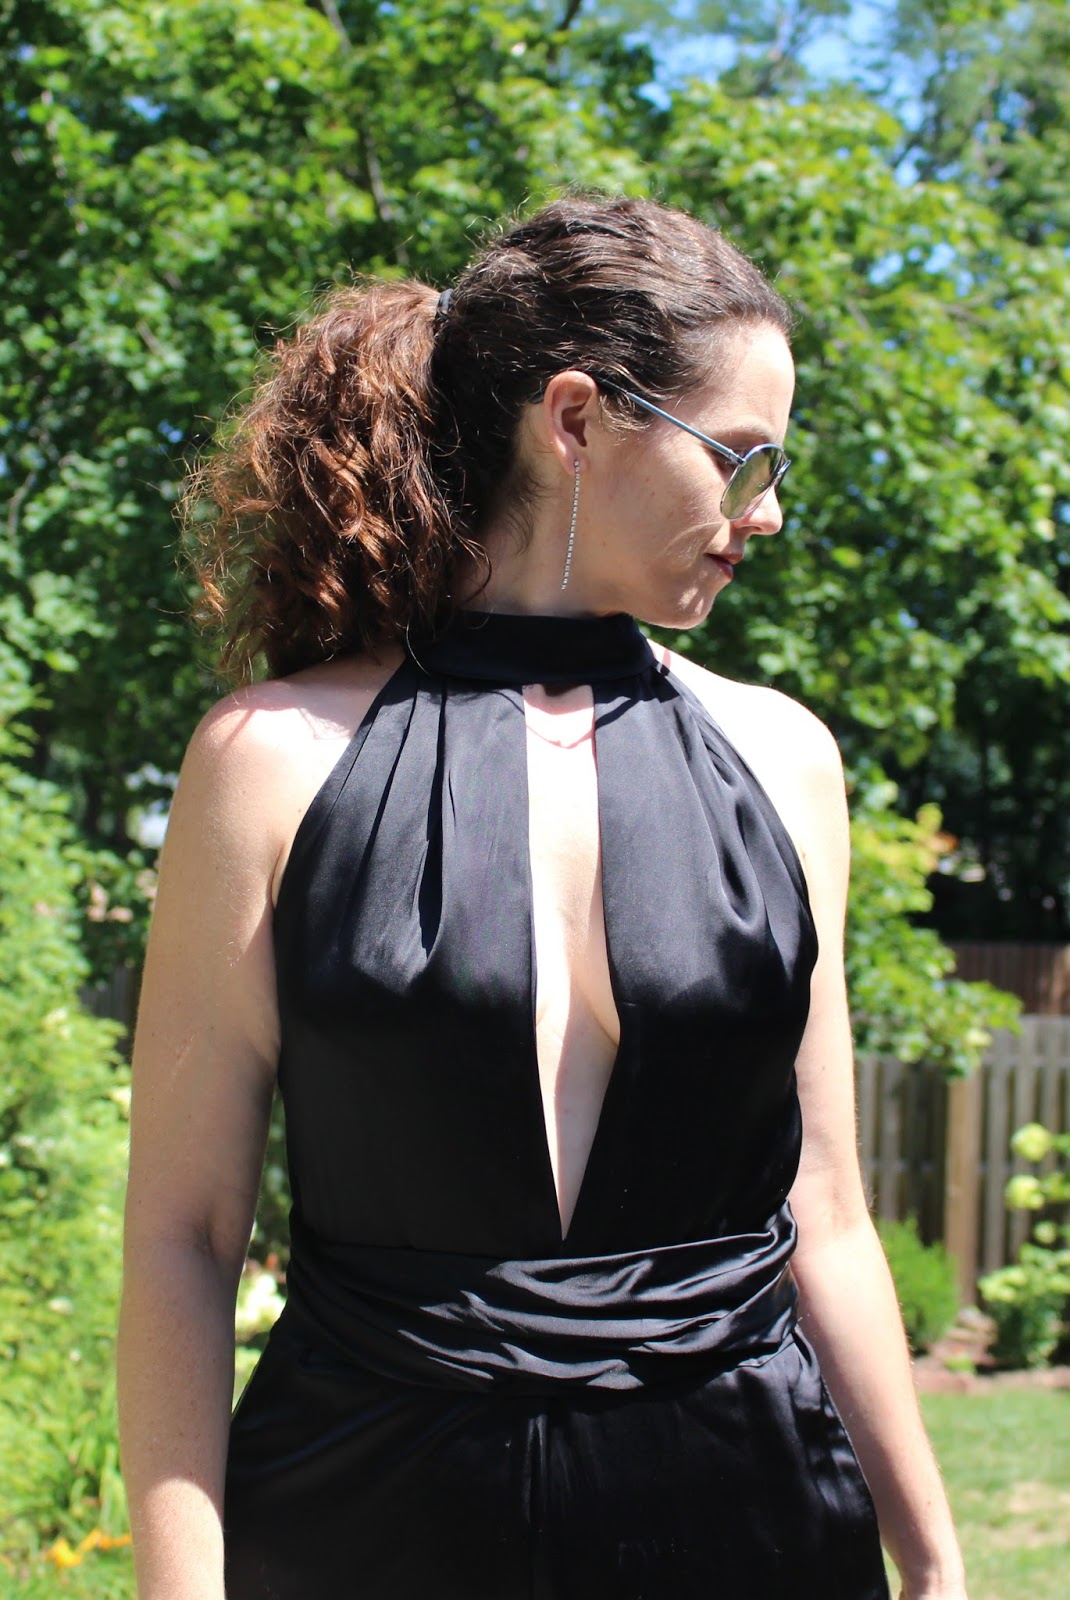
As for the rest, I just played around with the length and width of the pattern until I achieved a fit that worked - there was no magic there, just some trial and error sewing.
I really loved this pattern and my tux. The only two style changes I made are that I decided to eliminate the pockets for a slightly sleeker look and I changed up the cummerbund/belt a bit. Honestly, the belt was the one part of the pattern that I didn't muslin and the one part I was disappointed with. I would do it completely differently next time. It's basically a straight (not curved) inside piece with a bias cut outer piece that is meant to drape into the pleats you see. I am very curvy at the middle and the straight cut just didn't work on me - it kept either riding up or slipping down. You can see that I changed the closure from hook and eyes to two ties so I could better adjust the fit, but even that didn't really help. In the end I tacked the belt to the center front and at the side seams so it would stay in place. Also, the bias draping really didn't work without a lot of adjusting. Perhaps it's my fabric. But to do again I would opt for a more complicated belt with shaping and pleats.

Speaking of fabric, this is a GORGEOUS viscose satin that I picked up at Mood. I didn't want to spend a fortune on silk or be all sweaty in an unbreathing sweaty poly. For $18/yd this was the perfect thing. It looks and feels really luxe, was beautiful to sew and I was cool and comfy even on the dance floor. Oh, and I did in the end choose to make the side stripes out of faux leather rather than sequins.

And that is it with fit and alterations!
This style is not for everyone, but I think it strikes a good balance of being sexy, thanks to the neckline and peek-a-boo back, without being trashy thanks to the fuller, more modest side/armscye coverage. With that much front cleavage, I wouldn't want any kind of side-cleavage or a short hem or a skin tight fit. My personal sense of how to be sexy, but not trashy is to go sexy in just one area at a time (ie: sexy cleavage OR hemline OR body con fit, but not more than one at a time). And this pattern fits the bill. So, good style and drafting decisions, McCalls!

I really hope I have more occasions to wear this tux. I do love a great dress, but this was more comfy and I felt unique and chic and a bit daring in it. And once I worked out the fit, I really did feel secure and not at risk of any wardrobe malfunctions on the dance floor. For a black tie optional wedding, where I really didn't know how formal most guests would be, this was just the thing!


