Wednesday, July 3, 2013

Finished: Clutch Purse x 2!

The weather continues to not cooperate for a photo shoot of my linen jeans trousers. However, my crazy productivity seems to be going strong.  Last night when I got home, my mojo was standing there tapping her foot at me impatiently. So we got right down to work and, by the end of the evening, we had two cute fold-over clutch purses.


Two cute clutches!


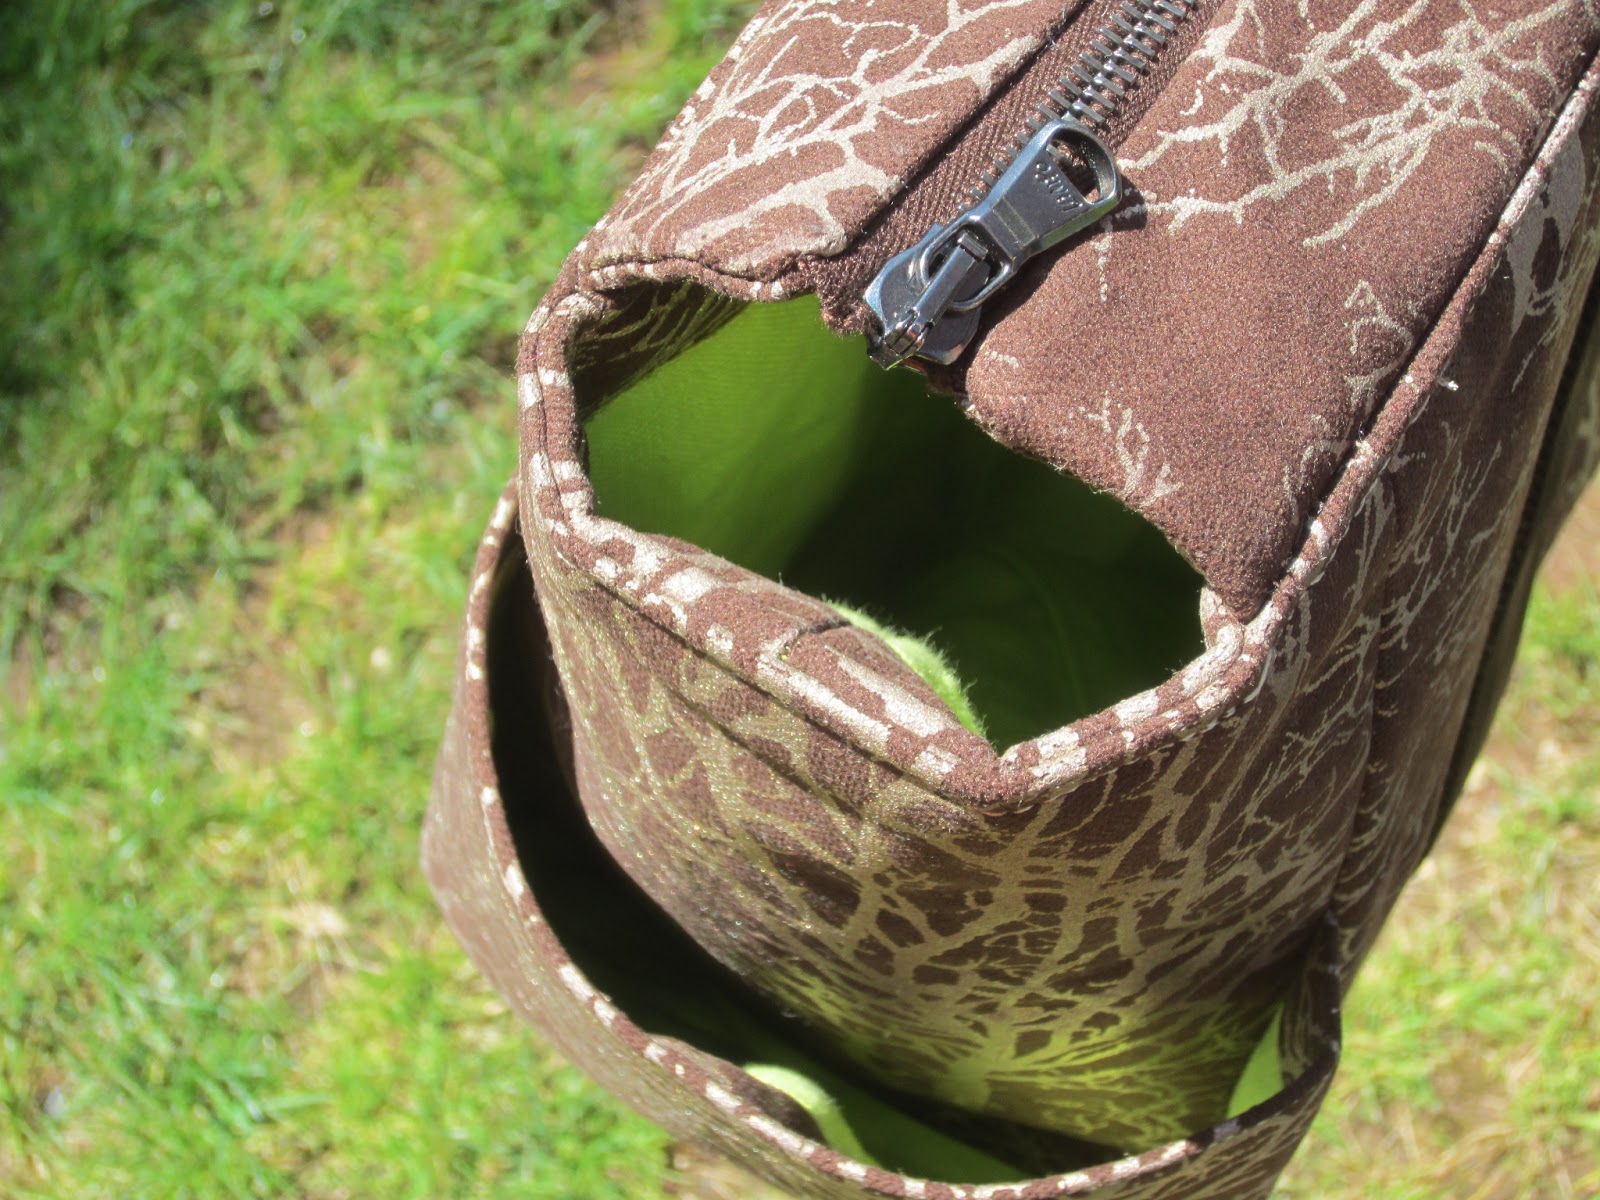
Surely, you recognize this fabric from the diaper bag I recently made for my friend, Magenta. I had some large remnants left over from that bag. So, one of these clutches is headed her way as a companion piece. I even included a D-ring so that she can attach the clutch to the lanyard on the inside of the diaper bag.


D-ring
 
Anyway, I basically followed this tutorial for the clutches. This being me, I changed a few things. First, instead of cutting the outside fabric as one piece, I cut it as two and sewed it together so that the pattern would be right side up on both sides of the bag.

 Next, I added a magnetic snap so that the clutch could be folded over and secured.

A square pouch with magnetic snap

Here's how I apply the snaps on the inside: I carefully measure and mark where I want them, stabilize with a small square of hair canvas and then apply. I use an awl to start to open the holes that the tines go through. 


Snaps from the inside.


And lastly, instead of binding the side seams as instructed, I used my serger to sew and finish in one swoop. I think one of the reasons I've been so productive this week is that I decided I wanted to get more comfortable with my serger. So, I've been serging away.

Final details are that I used a lime green cotton to line the bags, the same metallic thread for top stitching and really nice Lampo zippers from Botani. Seriously, my high end zipper habit knows no bounds when the zipper is a design feature.

Lampo Zippers are the best!

That's all there is to tell about this very simple, slouchy clutch. This brings my total finished items in the last week to 11 sewn and 2 knit!!! Wowee!  Here are two final shots:

Plain side

Zip side

Magenta, watch your mail for this little extra!

Monday, July 1, 2013

Finished x 9 + 2!! And my First Hand-Worked Buttonhole!

Holy cow, peeps! I was crazy productive this weekend! Not only did I finally finish my linen jeans-style trousers, but I sewed 2 wrap skirts, 2 tote bags and 4 simple knit tops. I also cut two additional bags and finished two knitting projects. Seriously, that is 9 sewing and 2 knitting projects complete! (Happy dance!)

Long story short: I'm on a doctor-ordered week off from running/yoga/PT/all things strenuous. Since I baked up a storm last weekend and had no plans, I had nothing to do but sew and knit all weekend long. And my mojo showed up with her game face on. Yeehaw! Who knew I could be so productive with no other hobbies fighting for attention and a roster of easy projects?

The only problem: I haven't photographed any finished projects yet. However, my show-and-tell for today is some finishing steps on the trousers including my first ever hand-worked buttonhole.

Buttonhole: done by hand.

When I decided to go with a jeans-inspired look for these trousers, I thought they needed a jeans button. However, my sewing machine has had problems with waistband buttonholes in the past. So, I decided it was as good a time as any to learn how to do a buttonhole by hand. Thankfully, Sunni wrote a great tutorial. My buttonhole is not particularly pretty, but it is functional and I think (hope) it will hold up.

See, not so pretty up close.


I hand overcast the hole before stitching in order to deal with the fraying and bulk of this particular fabric and it's underlining and fly pieces. Trying to get evenly and closely spaced stitches remained challenging. I can't help but feel that on a thinner, less ravel-prone fabric this would have been significantly easier. Thank goodness for my thimble.

Since we are looking at the waist, I should add that my idea of turning the waistband to the inside to use as a facing and then adding a row of gold topstitching to create an ersatz waistband worked out very well. I had to shorten the zipper a bit and, overall, the fly area is not as neat and pretty as it was before, but the waist now sits where I want it and the crotch length looks much better.


Before: Real waist band

After: Ersatz waistband and jeans button (bad lighting)

One unintended side effect of raising the crotch/waist was much less length at the hem. Fortunately, I had planned on a deep hem, which all but disappeared. However, doing a faced hem added the length I needed for a nice deep hem that I top stitched.


Faced hem from the inside.

And top stitched from the outside.


I'm glad these trousers are done. They were much more work than anticipated. Hopefully, it will be sunny enough tonight to snap a few pics and get a final post up! Stay tuned because there is a lot more to tell this week with all my finished projects!

Wednesday, June 26, 2013

Berry Bounty

So, I mentioned that Phin and I went strawberry picking over the weekend. It was hot and sweaty work, but very rewarding. Farm-picked, ripe, local berries smell and taste unbelievably good. In fact, they taste like strawberries, unlike the mutant-sized cardboard-like berries that you can get at the supermarket most of the year.


Fleeting berry perfection

Just look at these perfect jewels!

Anyway, given that berries that are picked when they are actually ripe have a very fleeting shelf life, both Phin and I had big and immediate plans for our berry hoard, which also included raspberries and blueberries that we bought at the farm stand.


Phin's lovely Bumbleberry Tart!

Phin made a Bumbleberry Tart. I helped by making a Pate Sucree crust, which he filled with a freshly made blueberry compote and then topped with a crown of fresh berries. No recipe was used.

Since it's officially summer, I decided to pull out the ice cream maker. Last year I made, but did not blog about, Strawberry Sour Cream Ice Cream. So, here it is.

Strawberry Sour Cream Ice Cream!

1lb strawberries, hulled and chopped
1Tbsp vodka (or other liquor)
3/4 c sugar
1 cup sour cream
1 cup heavy cream
1/2 tsp lemon juice
Optional 1 cup sliced berries to mix in at the end 

Stir sugar and vodka into the strawberries and leave it macerating for an hour. Or do like I did and stick it in the fridge overnight. Puree the strawberry sugar mix with the sour cream, cream and lemon juice. Chill thoroughly and churn according to you ice cream maker directions, adding in the optional berry slices near to the end. Do your best to resist eating all the ice cream right out of the machine. Fini!
This recipe, which is from my favorite ice cream book, The Perfect Scoop, was designed for mediocre, supermarket berries. So using perfectly ripe and flavorful berries made this ice cream explode with strawberry flavor. And the sour cream adds just the right tang to make sure it's not cloying.


After a very sweaty 5k trail run at a historic farm nearby, this was dinner last night. Seriously folks, I ran a personal worst 5k time. It turns out that I like the idea of trail running much more than I actually like running cross country, but what really did me in was the heat even though I was well hydrated. Live and learn. Ice cream was the perfect tonic.


Essence of Strawberry...mmmmmm

And everything tastes better when served in a pretty champagne glass, no?

Monday, June 24, 2013

First Weekend of Summer!

After last summer, which went by in a blur of back pain, I'm finding myself oddly determined to make the most of this year. So, I got right down to it this first weekend of summer. Phin and I picked strawberries, planted tomatoes and herbs, and grilled up a storm with family on Saturday and just for ourselves yesterday. Plus, I ran a personal best 1 mile (I'm promoting myself from snail to tortoise) and managed to fit in a little bit of sewing and knitting. I'm also in the midst of a baking blitz.

Summer always inspires me to get into the kitchen. I've been working on perfecting a few new-to-me recipes, including this one for blondies. 

Ooey-gooey delicious blondies!

After quite a few batches, I feel like I finally have them right. My early batches were very dense in the center (leaden) and overdone (dry and crunchy) around the edges. These ones came out moist throughout and had the right gooey denseness, without being leaden. Also, these are very very nutty, which is a big plus in my book.

Blondies (Peanut Butter and Chocolate Chip ones!)
8Tbsp (4 oz, 1 stick) butter
16 oz (2 c) brown sugar
1/2 tsp salt
1 tsp baking powder
2 tsps vanilla 
1 1/2 c (6 1/4oz) flour
3 eggs
1 1/2 c peanut butter and/or chocolate chips
1 1/2 c (6oz) chopped walnuts or other nuts

Mix sugar, salt, baking powder and vanilla in bowl of stand mixer. Melt butter and mix into sugar. Let cool to room temperature. Add eggs one at a time, beating well  after each addition. Mix in flour, followed by nuts and chips. Bake in a greased 9x13 pan at 350 for 28 minutes. They should still be gooey, but not runny, in the center. 

Mmmmm... blondies!


This is almost exactly the KAF Bakers Companion recipe, but mixed together and baked according to the KAF Whole Grain Baking book recipe. Really, the key difference is that you beat everything in a mixer and bake for a shorter amount of time. Also, I omitted 1/4 tsp of optional butterscotch flavor since I had none. Oh, and I substituted a mix of peanut butter chips and chocolate chips for the butterscotch chips. I used about 2/3 pb and 1/3 chocolate. So these are nutty and delicious with little punches of chocolate. Perfect!

I bake much more than I can eat, even with Phin's help. But I have a very easy storage solution for baked goods: the freezer. At any point in time, you can usually find some assortment of brownies, cookies, bread, muffins, cake and pie in my freezer. (NB: custard-based pies, like pumpkin, don't freeze/thaw very well.)

Ready to be frozen!

After taste-testing, most of the blondies were put on a wax paper lined baking sheet and frozen. Once they were solid, Phin moved them to a zip lock bag for future devouring and sharing. This way, I always have desert for company and something to bring when I'm the company, and I never have to worry about sweets getting stale or eating them all myself.

Friday, June 21, 2013

Done!!! But It Feels Insulting to Call This a Diaper Bag

I dare you to call this a diaper bag!

Since Wednesday was a beautiful day, I was able to reschedule my outing with my excellent friend Magenta and her new little one, and drop off my gift - a diaper bag - in the process. I can't help feeling that it's unfair to label this a diaper bag. I'd be happy toting this around sans baby.

Here are a bunch of photos. 

Front - I think my pattern matching has come a long way!
 

Back

This is my third version of Butterick B5005, which I first reviewed in 2009 (blog post here and PR review here). I don't have much to add to my initial comments about the pattern. It's a great bag, and although it's sold as a diaper bag, each time I've made it I've thought about making one for myself to use as a weekender or carry-on bag for travel.  I think the only thing the bag might be lacking is a zipper pocket. And, frankly, if I had thought of it last week, I would have added one. Oh well.

Over time, I've begun using more hardware on my bags.  On this version, I used webbing from Pacific Trim for the straps...


...a magnetic snap for the front pocket...


...and a zipper from Botani, that I had custom shortened.


I don't have a good picture of them, but I also added feet to the bottom of the bag. You can see them a bit in the first photo. Also, I added a lanyard with a lobster claw on the inside for clipping keys or a binky to.

As for the rest, I used lime green cotton broadcloth for the lining. I thought that with such a dark rich fabric, the green added a real punch and that lining in a light color makes it easier to find things inside your bag when you don't have the best lighting or at night.


Broadcloth lining.

It's a bit hard to tell the specific color of the bag from the photos. The brown really is a lovely coffee color, which did photograph ok, but the tree motif is metallic and was impossible.  It's brass colored. I was not able to find top stitching thread that matched either the brown or brass, so I used metallic embroidery thread that did match very well. My sewing machine has a backstitch stitch that I used so that the embroidery thread would be thicker and sturdier and show up better as topstitching. I'm happy with how it looks despite a few episodes of sporadic cussing when the thread snapped or snarled repeatedly.

Top stitching with a backstitch.

I used fusible hair canvas to add some body to the bag, being careful to trim it away from the seam allowances. Bulk management in the seams is a consideration with a bag like this. At the corners where you have pockets, sides and bottom all converging, you need to grade seams carefully.

Also, the pattern calls for cardboard to make the bottom of the bag more rigid, but I used two layers of perforated plastic canvas (like this) instead. I find that the canvas gives the bag bottom firmness but also flexibility and doesn't break down over time or with spills like cardboard would.

That's about all there is to tell. I had a wonderful day with Magenta and Mini - there's something so sweet about tiny baby feet isn't there? And the bag seemed to be a hit. Even Magenta's yorkie looked expectantly like it might be for toting him around in. (Sorry, Chewie.

So, that's that! I hope you all have a great weekend and happy first day of Summer! Yay summer!

Thursday, June 20, 2013

Hully Gully Winner and my 800th Post!!

So the winner of the Shabby Apple Hully-Gully Skirt Giveaway is.....


Faye Lewis!!!!!

Dragon the Hippo gets very excited about giveaways, so we let him preside over our very humble and analog raffle to ensure impartiality.

As I was about to hit "post," I realized that this is in fact my 800th post! How time flies when you are busy sewing, knitting, baking and doing all sorts of fun things! Thanks for reading along!

Oh, and since I am thinking about my blog, I suppose this is as good a time as any to say:  Follow my blog with Bloglovin. I know I am about the least technically savvy person in the blogosphere, but since Google whatever is going the way of the Dodo, it seemed like it was time to flap to a new home.  

Monday, June 17, 2013

Linen Pants: Two Steps Forward and One Back

***Hey peeps, there's still time to sign up for Friday's Giveaway! Click here.***

This weekend, my mojo was nowhere to be found. I should have known better than to try to force myself to sew or knit. It was two steps forward and one step back with my jeans styled linen trousers.

Steps forward:  I sewed the zipper fly and finished the inseams. This is what the faux Hong Kong seam with underlining looks like once the seam is sewn.

Isn't this a great finish for a ravelly linen?

Then I sewed the CB seam, which I also did as a flat felled seam. So, the insides of these trousers could not look better - so neat and finished!

I also attached the waistband and started adding some decorative stitching. Here's the zipper fly and waistband. My crack stitching could not have been better, and I've been having fun using remnants to make fly shields lately. Doesn't it look great?


Zipper fly and waistband.

Right. Unfortunately, this is the point where things started to go not so perfectly.

Steps Backward: It was time to try the pants on to adjust the length of the elastic that I had threaded thru the waistband. But once on, I realized a major flaw in the trousers. One of the design features of jeans is less ease at the crotch compared to normal trousers. I had sewn these pants as trousers (ie: normal crotch length/ease) with jeans styling (ie. gold topstitching, even along the center/crotch seam). This made the crotch - which looks totally normal on my red linen trousers -  look long and droopy and sad on the jeans-style trousers.

No worries, I thought, I will just hike them up a little higher and they'll look fine, right? WRONG.

I had to hike them up to slightly above belly button level to get the crotch to look right. Now keep in mind that here is how the red ones fit - exactly where I like my trouser waist to be.

About 2" below the navel = perfect!
I know that rise is a generational issue and that some of you may think that waist-height is fine. We will just have to agree to disagree on this. Anything higher than 1" below my navel is just not comfy and looks, well, tragically un-hip to me.

Anyway, after some pouting and therapeutic cussing, I decided to un-crack stitch the waistband and start figuring out what to do. The current plan is to use the waistband, which is still attached, as a facing by folding it to the inside. I'll use it to create a channel for the elastic and then add topstitching to make it look like there is a waistband. So, essentially, it will be a cut on/faux  waistband. I actually had trousers with this treatment years ago and it was very flattering. So, my fingers are crossed that this will work out. Luckily, I had decided that I wanted a deep hem, so there is enough length in the legs that these won't end up too short.

And since I've decided to complicate this project - because that seems to be what I do best - I also made two decisions.


Patch pockets
First, if they are going to be jeans, they might as well have patch pockets, right?

Second, my SM isn't really doing a great job with the buttonhole. So, I've decided to hand stitch the buttonhole, which will be a new-to-me skill.

Anyway, back with more when I've worked out the rest. Oh, and I should add that I did finish my friend's diaper bag. Our meet up was postponed because of the torrential rains on Thursday. But I'll post some finished pictures when we get together this Wednesday!