Thursday, January 27, 2011

Mac + Cheese, or as we say in France "Macaroni au Gratin"


With more snow blanketing the Northeast, yesterday seemed like a good day for comfort food. In previous mac+cheese experiments, I tried mom's recipe, the crowd-pleasing recipe (Martha's "crack n cheese"), the scientific approach (aka "death by mac n cheese"  from Cook's Illustrated), and a few...urm... unique variations.

So, diving back into my mac+cheese experimentation, I've decided that I need to focus on the sauce. Classic French mornay sauce is the base of most m+c recipes. It's basically a white, or bechamel, sauce with cheese added in. And, since we are going all French today, what better recipe to use than Thomas Keller's Macaroni au Gratin from his Bouchon Cookbook.

Other bloggers have used the recipe before (click here for recipe). So, I'll just tell you what I did differently and share my slide show of the process.


Changes:  I cut back the amount of sauce to 2 cups instead of 3 since I found so many of the past recipes to be too saucy. I also didn't strain the sauce. And I added some small cubes of cheddar to create little blobs of molten cheese throughout the mac when I realized how little cheese there actually was in the recipe. I also somehow didn't have a bay leaf (oops).

Results: This is definitely more gratin than mac n cheese. It definitely has a French sensibility. The sauce was flavorful and more delicious than my past versions - you definitely tasted the sweetness of the onion and cream, the pepper and nutmeg. (Yum.) But - maybe because it had less butter - it didn't seem as leaden. Most of the other recipes had you butter the pasta before mixing with the sauce - maybe that is the key difference. However, the same problem persists - not cheesy enough! That said, the little blobs of cheddar were a very good idea.

So, I think this sauce may be a keeper. But my next try will have more cheese (Phin is rooting for multiple types), less of the sauce, and definitely blobs of cheddar.  Stay tuned!

Wednesday, January 26, 2011

Worst. Welt. Pocket. Ever.

Over the weekend, I decided that I needed to get moving on my next pair of pants. One of the first steps will be to sew a double welt pocket on the back. So, I used some fabric remnants to practice. What can I say? It didn't go so well...

Yet, it had seemed to be going smoothly as I cut out the pieces and began assembly. I used the method in Connie Crawford's Guide to Fashion Sewing, which is generally my go-to reference. The directions are always well illustrated and very straightforward.

Cut and marked

But the end result was anything but pretty!


Yikes! Look at the puckering in the corners!

Anyway, I've looked at some other methods, including the one in Tailoring: The Classic Guide to Sewing the Perfect Jacket and Claire Shaeffer's Couture Sewing Techniques, although I find the latter is not illustrated enough for me to follow. And there are LOTS of on-line tutorials to lean on. (Thank goodness for all the experienced sewistas with blogs! You are all worth your weight in couture fabric!)

Anyway, I think I've figured out where I went wrong (um, dull scissors and imprecise cutting) and I am going to give it a few more tries. With any luck, I will have a much nicer test pocket to show soon. 

Monday, January 24, 2011

Lining for a Lady: Ahhhh silk...

I've been talking about (and buying pieces of ) silk for a while now. I just love silk. I love how it feels, how it looks... how it feels. It's really rather odd that the Lady Grey coat lining is the first time that I actually (I think) have sewn on silk. Admittedly, I was a bit intimidated at first. Silk can be slithery.


Lining with collar facing

Lucky for me, I had a game plan. I recently bought More Fabric Savvy by Sandra Betzina. What a great book - why did I wait so long to buy it?!?! I think one of the big challenges when you begin to sew is not just picking appropriate fabrics for a project, but understanding how to sew on different fabrics - what needle, thread and stitch to use, what kinds of interfacing or underling would work well, what setting to use on your iron, and so forth. Both my fabrics for this project - wool boucles and silk charmeuse - are new-to-me fabrics as far as sewing goes. So, having a handy reference to point me in the right direction is a huge asset.

Anyway, my lining is coming together nicely. (Lots more princess seams.) I had been worried about the seams puckering or the fabric being pulled into the throat plate and getting chewed up. I think I held my breath when I started sewing on it. But so far no problems. I am using a fine needle and small stitch length, as recommended, and my seams look good. There's a lot of raveling going on, so I will definitely not be leaving the seam allowances unfinished. But the lining should be ready to go when I need it... if I ever finish all the hand stitching. Ha ha ha.

Speaking of hand sewing, given how many seams there were to catchstitch down and how very slow I am at it, I finally caved in and decided to try topstitching the seams of the shell on my sewing machine instead. And, wouldn't you know it: I love the results! The topstitching thread doesn't really stand out from the boucles all that much, but the overall effect is that the seams look very finished and professional. So, for this time, at least, the easy solution is also the better one! 

Can you see the topstitching? Kinda hard.
So, tonight it is on to part 3 of hand stitching... taping the roll line of the lapels.

Friday, January 21, 2011

Positive Body Image: Miss Piggy

TGIF!! I had a crazy week at work and am just happy the weekend is here. I'll post about the lining of my coat next week, but here is just a little bit of happiness for you on a Friday.

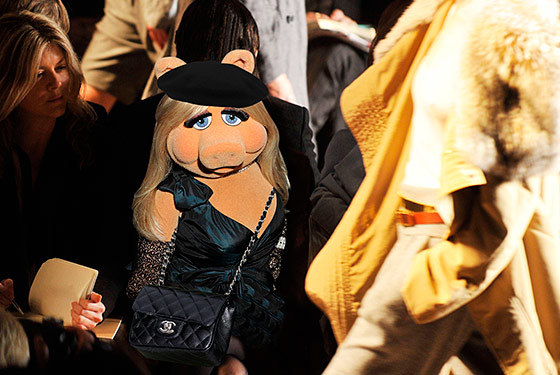
Miss Piggy: Fashion Icon

I never appreciated her as a child, but Miss Piggy is a feisty and fabulous heroine, who is not afraid to flaunt her curves. Armed with her signature opera gloves, Piggy knows she is a star, a fashion icon and a sex symbol, and isn't about to let any silly notions about body shape and size stand in her way. She's also not content to sit at home waiting for her prince to come rescue her. Nope. This pig is in charge of her own destiny.

So, I thought it was a stroke of brilliance when I learned that in the new Muppet movie, due out next year, Miss Piggy has left the muppet theater behind to be a fashion editor at French Vogue.  LOL. OH, and apparently Marc Jacobs will be dressing her.

Marc Jacobs and Miss Piggy
Happy Friday, everyone!


Tuesday, January 18, 2011

Princess Grey

I'm thinking of renaming the Lady Grey coat "Princess Grey" on account of the vast number of princess seams that I sewed on Saturday. Honestly, it was very satisfying work. Taking the time to do things carefully is rewarding in its own way - seeing each clipped and notched seam go together so nicely and press up without any puckers or pulls.


So pleased with these princess seams.

I made great progress on the coat, but unfortunately for you, it's at the point in the process where it just looks like a jumble of parts. I don't really have an exciting "reveal" photo since there isn't anything completely done.

Some parts l. to r.: Sleeves and belt (both inside-out), back piece and front/lapels.

In addition to sewing all the shell pieces that I could, I also started to sew up the lining (more on this tomorrow or Thursday). And I made slooooowww progress on the hand stiching. By now, I thought I would be doing all the pad stitches on the lapels. But I'm still catch stitching all the seam allowances down.

 
Can you even see my carefully sewn catch stitching on the right seam allowance? No. Oh well
One thing I will say is this: my hand sewing may not be getting any faster, but my stitches are definitely getting much more consistent and pretty!

I'm really enjoying working on this project slowly and surely. Somehow, it's very satisfying not to rush and to just enjoy the process.

Wednesday, January 12, 2011

Mr Chocolate meets Cookie Monster

Greetings from the snowy tri-state! It seems like a good day to talk about baking, no? Pulling something warm out of the oven seems like the best way to ride out a blizzard. 

I'm a third generation chocoholic. In fact, my family takes our addiction to love of chocolate so seriously that Mom Muse's New Year's resolution for 2011 is to always have chocolate in the house; serious words from one who has be known to carry a bag of m&m's "in case of an emergency."

But me, well, I'm more of a chocolate chip cookie/brownie fiend as opposed to a candy lover. And, about two years ago, I blogged about chocolate chip cookies, putting an article in the NY Times that suggested that resting the dough makes a better cookie to the test. It was a three part experiment (one, two, three) and it does actually make a difference. At the time, I just used the Nestle's Tollhouse recipe. However, I always meant to go back and try the recipe by Jacques Torres, aka Mr Chocolate, that was included with the article.

Batch 1: made with jumbo chips and no nuts
Well, I finally tried out Jacques' recipe over the holidays. I noticed that it had been included in the new Essential New York Times Cookbook which I gave to Phineas for Christmas, and then promptly began using myself. The results: excellent! This is my kind of recipe. It calls for specific ingredients (both bread and cake flours), doesn't skimp on the process (cream for 5 minutes, rest dough for 24 hrs+), and adds a few masterstrokes (a sprinkle of sea salt right before baking).

For the first batch, I stuck to the recipe and even used large flat chips, similar to the "feves" that Mr Chocolate recommends. Those cookies flew out the door over the holidays. For my second batch, baked up on Monday night, I used regular size chips, added walnuts (one cup or so) and cut the amount of white sugar by half (so, cut back total sugar by about 1/4). To my taste, the second batch is even better than the first. I'm eating cookies as I write this, and boy-oh-boy is my inner Cookie Monster purring!

Batch 2: With nuts and regular size chips
My tips for this recipe are: 
  • Chocolate matters: I use Guittard Semisweet Chocolate, my preferred chip, which I get at Whole Foods. Once you try Guittard, there is just no going back to a Hershey or Nestle's chip. 
  • Do not skimp on creaming the butter and sugar. Five minutes at least! Do this for all of your baking and you will see lighter, better textured results. 
  • Unless you want a cookie that is a meal, the ginormous 5" cookies that the recipe suggests are ridiculous. I made 1 1/2" cookies and shortened the baking time to 9-10 minutes. It made 5-6 dozen cookies (um, not counting the dough that got "sampled" along the way).
  • Rest your dough over night at the very least, but 36-48 hours really is the sweet spot for gorgeously browned, complexly flavored cookies. I also find that, given my busy life, it's easier to spread making the dough and baking the cookies over a few days. I don't have to commit a whole evening to the project. 
Anyway, if you crave a really gooey and good chocolate chip cookie, this is a winner. If you don't think you have the will power to not gobble the dough while it rests, well, who am I to judge? Either way, your inner Cookie Monster will thank you and your kitchen will feel and smell all warm and cosy.

Monday, January 10, 2011

Hand Tailoring: An Ode to the Tetanus Shot!

At long last I am actually sewing my Lady Grey Coat... very slowly, by hand and sticking myself repeatedly with a needle.


Neat little rows of hand basting.

Although it is not specified in the pattern instructions, I decided to do all of the hand tailoring recommended by Gertie. Aside from a better end result, my ulterior motive is to become better at hand sewing. Lucky for me, my tetanus shot is up to date for this endeavor. And, I can pretty much do the hand sewing while sitting in front of the tv* (perhaps this is the cause of all the sticking?)

I'm nearly done with Part 1 - basting the hair canvas to the front side shell pieces. It looks so neat, doesn't it? I feel all sew-y and impressed with myself at the moment. Anyway, I also cut all the lining pieces out of my beautiful silk charmeuse over the weekend. I just love this fun black/white/turquoise zebra print. Plus, I definitely I have enough left over to make myself a cami or some other little dainty thing.

Silk Charmeuse on the right.

Tonight I plan to finish basting the side pieces and then I will move on to Part 2 of tailoring the coat front, which is where things get a bit more complicated. Moving forward, I will probably intersperse the hand sewing with fits of machine sewing the other pieces of the coat. That way, when I am done with the hand sewing, I will be basically ready for assembly. More during the week...

* BTW - if you are not watching Downton Abbey on PBS, you need to get on board with it. It has intrigue, charm and great costumes! Even Phineas (who notoriously hates period dramas) was sucked in last night. With scheming servants, an inheritance crisis among the fading aristocracy, gender politics in pre-WWI Britain, and Maggie Smith, well, what more do you need??