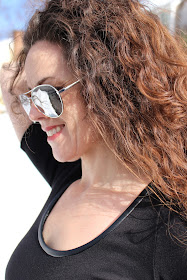
Last post about my mini wardrobe! When I finished the first 4 pieces, I had a number of scraps of faux leather left over. It was the sort of annoying amount that almost isn't worth saving, but is too much to feel justified in tossing. So, I decided to use it to make one last coordinating piece of my Mini Work Wardrobe.
I cut the neck band according to the Nettie Dress pattern's specifications. Since this is a stretch fabric which is not a knit and doesn't really have a grain line, I cut it with "the DOGS" (that's the Direction Of Greatest Stretch) which you find by grabbing hold of your fabric and stretching it in a few directions until you find the way it stretches most. In this case, that was perpendicular to the selvage.
I followed the basic method of inserting a neckline binding that Heather outlines in her sew along (prep the band here and insert it here). I find that I get the best results on a neckline when I:
And that is all there is to tell for this dress, other than I really like it. And messy haired photos.
So, that's a wrap on my mini-wardrobe! I've been wearing it pretty nonstop for work to the point where I don't really remember what I wore before. Ha ha.
But I do have lots more going on, so check back soon.
I sewed the Nettie Dress by Closet Case Patterns twice last spring (here). One is perfect as a wearable muslin - but only in the deep winter on account of it being a snuggly sweater knit - and the other, which fit better, turned out to be a fabric fail. So, I knew I would sew the dress again. I still don't feel like I have totally nailed this pattern (note to self: the bust dart height needs adjusting).
I decided to use a remnant of black ponte for this dress. I knew the ponte would be more stable than the fabrics I had previously used and figured that I would just s
ew the dress with a smaller seam allowance to give myself some extra wiggle room. But after cutting, I realized that the seam allowances for Nettie are only 3/8" to begin with. Oopsie! So, I've ended up with a rather close fitting dress, particularly thru the bust. C'est la vie!
The fun part of this dress is the faux leather accents which inspired it. I didn't stress too much about perfection. I just drew the insets onto the pattern - triangles that peak at the waist - traced off the pieces and added seam allowances. One of the great things about a pattern like Nettie is that a small simple embellishment can transform a simple dress into something more.
 |
| Insets |
I've already had a few people ask about the neck binding. It's important to note that I used a stretch faux leather for this dress; it married well with the ponte.
I followed the basic method of inserting a neckline binding that Heather outlines in her sew along (prep the band here and insert it here). I find that I get the best results on a neckline when I:
- stretch the binding more around the curves and don't stretch at all or very little along the straighter parts of the neckline - this prevents any parts of the neckline from gaping. It hugs nicely;
- make sure NOT to stretch the neckline of the dress. ONLY stretch the binding. Otherwise, wonkiness ensues.
And that is all there is to tell for this dress, other than I really like it. And messy haired photos.
 |
| Bed head, in need of a haircut, and sun damaged. My hair. |
So, that's a wrap on my mini-wardrobe! I've been wearing it pretty nonstop for work to the point where I don't really remember what I wore before. Ha ha.
But I do have lots more going on, so check back soon.


No comments:
Post a Comment